.avif)
How to Embed Online Forms to Webflow?
As we all know, contact forms are now the first step in turning users who visit your website into leads. Almost all the effort you make for your website is aimed to encourage your website visitors to fill out your contact form to add them to your lead pool. The faster and easier your website visitors can reach you, the more successful starting for the best customer journey. You should be able to create your contact forms as quickly as possible, manage them easily and organize the contact data without data loss.
.avif)
This guide will show you how to quickly create effective and flexible contact forms and embed them on your website in seconds. Retable is one of the best online form builders, especially if you are using Webflow, you can follow the guide and see how you can easily embed your online forms into your Webflow site. Also, thanks to the HTML code we provide, you can quickly embed your forms on your website, whether it is a plain HTML/PHP website or a WordPress website. Contact forms that you embed on your website are one of the easiest ways to collect data. And it does not require any coding or technical knowledge!
Here are the simple steps to embed a contact form on your website in seconds without any code! 🚀
Watch the video tutorial and read the guide!
Open a Retable Workspace and Create a Project
Let's first start by creating a Retable workspace where you can organize your forms and online spreadsheets. If you wish, you can organize all your forms and online spreadsheets in a single Retable workspace. If you wish, you also can create separate workspaces for each of your works. Let's see how!
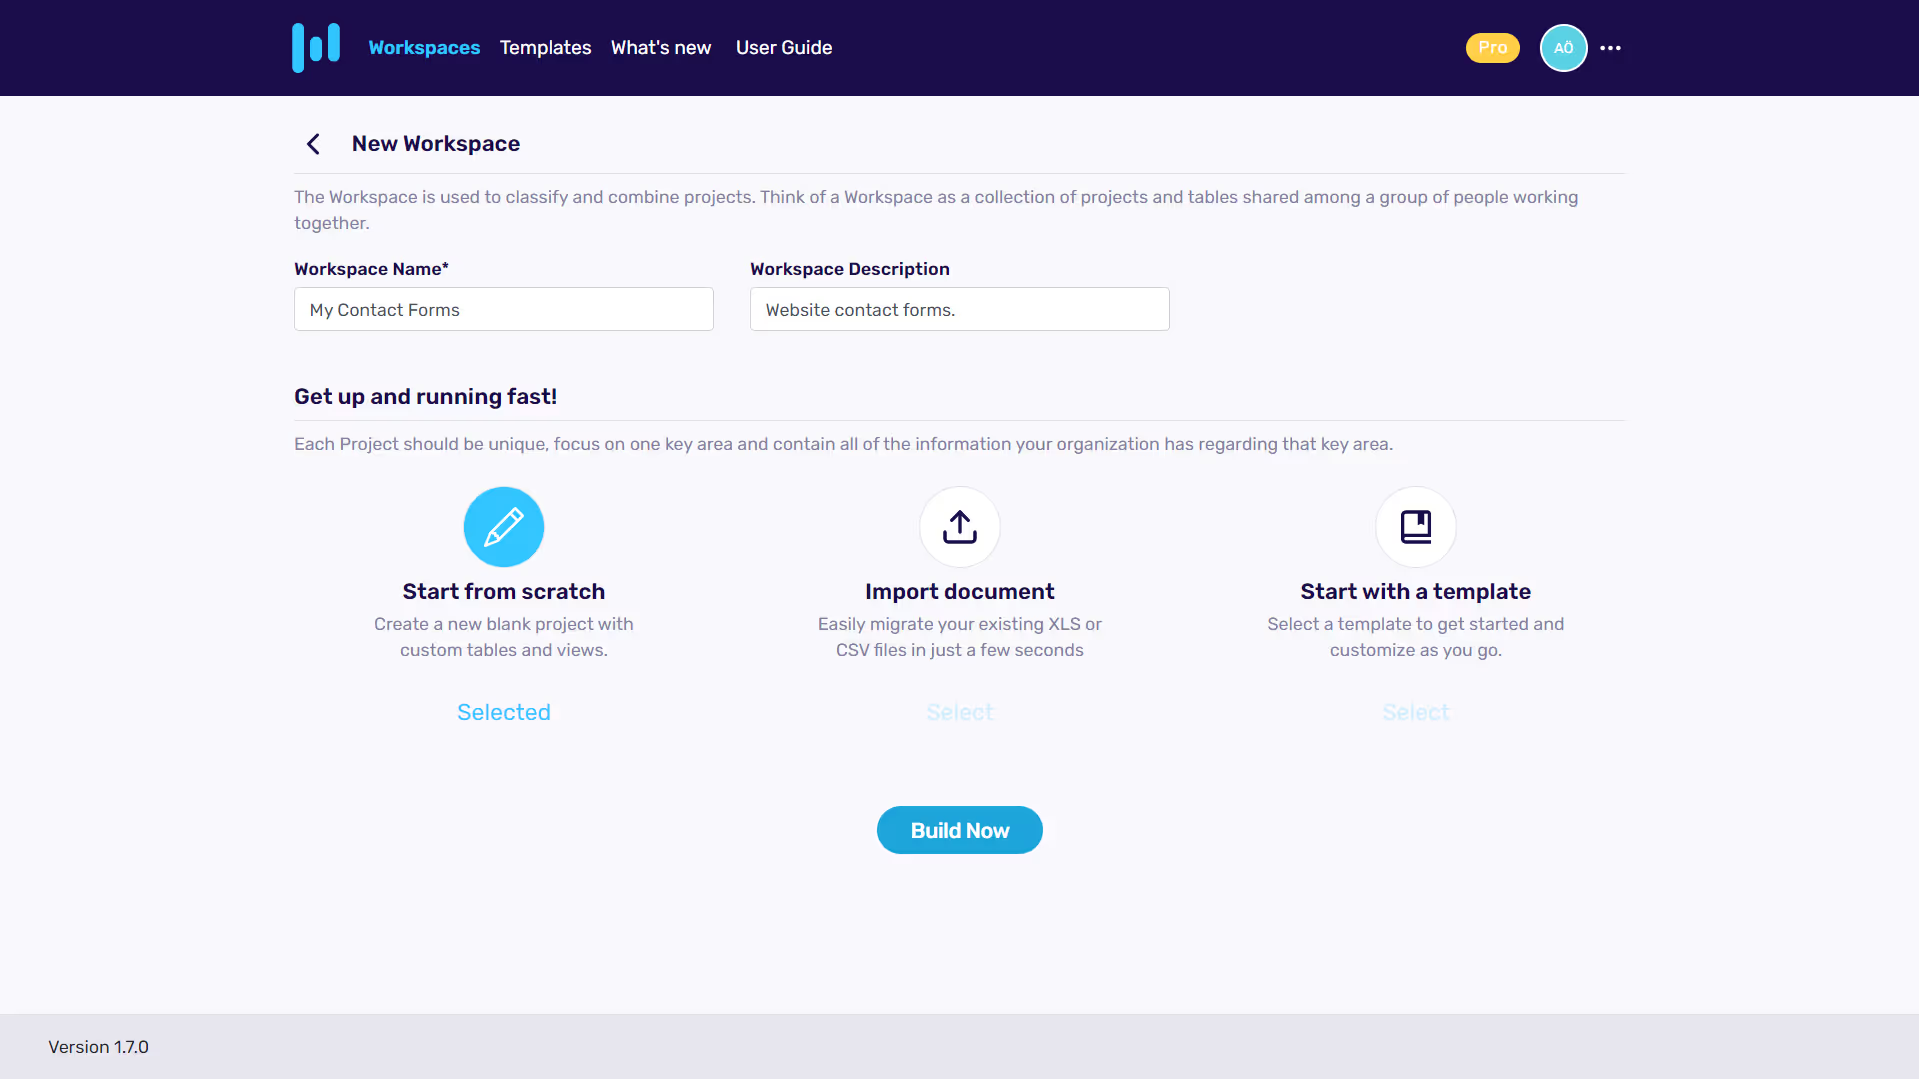
- Login to Retable.
- Click the "Add Workspace" button.
- Give your workspace a name. You can also add a description if you wish.
- Click "Start from Scratch" to create a form from scratch.
- Click "Import Document" if you want to create a form for one of your existing XLS or CSV tables.
- Or click "Start with a Template" to create a form with one of the sample use cases we have prepared for you.
- Finally, click the "Build Now" button.
Now your workspace is ready. When you click the "Build Now" button, a project will be created automatically in your workspace. Now let's start building your form inside this project!
Design Your Online Spreadsheet
- Go to your Retable dashboard.
- Click on the automatically generated project in the workspace you created.
- Name your project and customize its color and icon if you wish.
- Start creating the questions you need for your contact form.
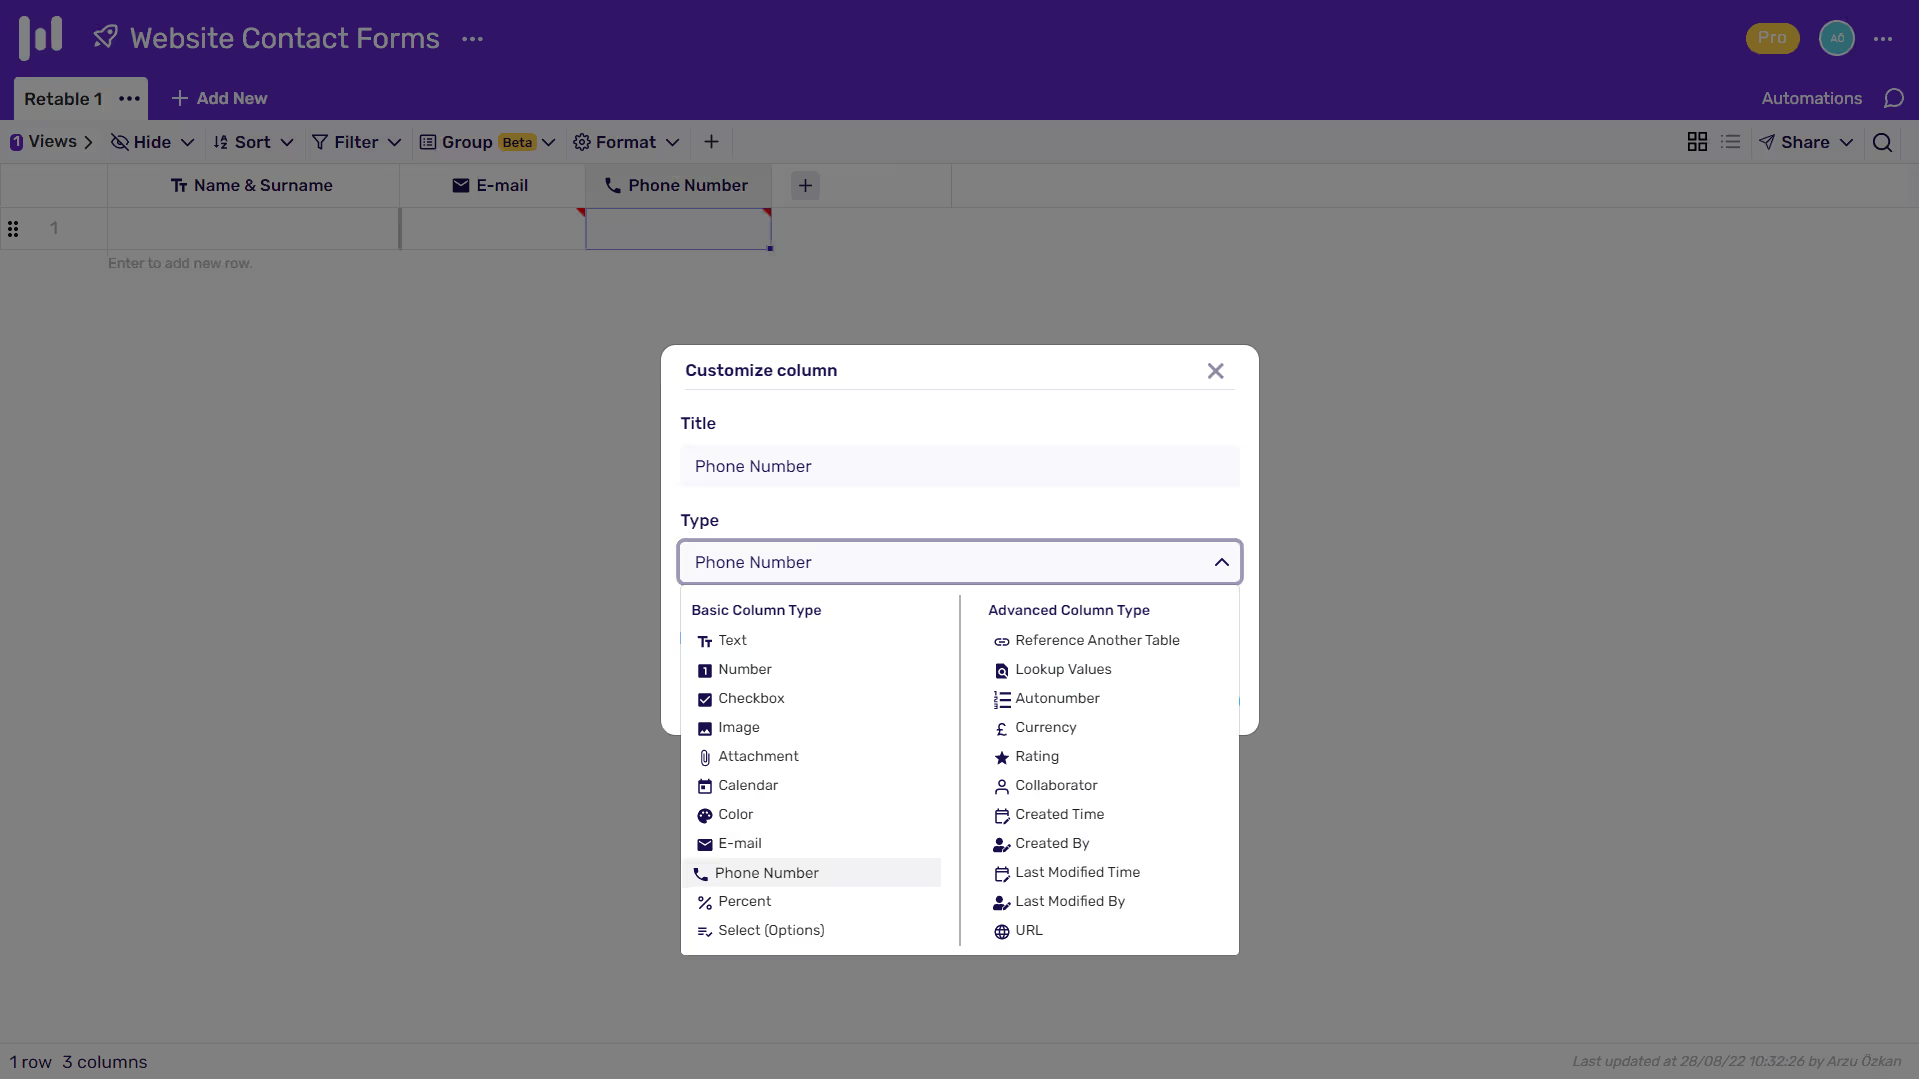
PS: Each column is a question. If you wish, you can specify the format of your contact form questions by changing the column types. For example, if you select the email column type, your question will collect email data. If you select the phone number column type, your question type will allow phone number entries. This way you can avoid incorrect data entry.
- If you want to make your questions required activate the required tick.
Create a Form View
Almost done! Now, if your questions are ready, we can start to design your online form with Retable's form view feature
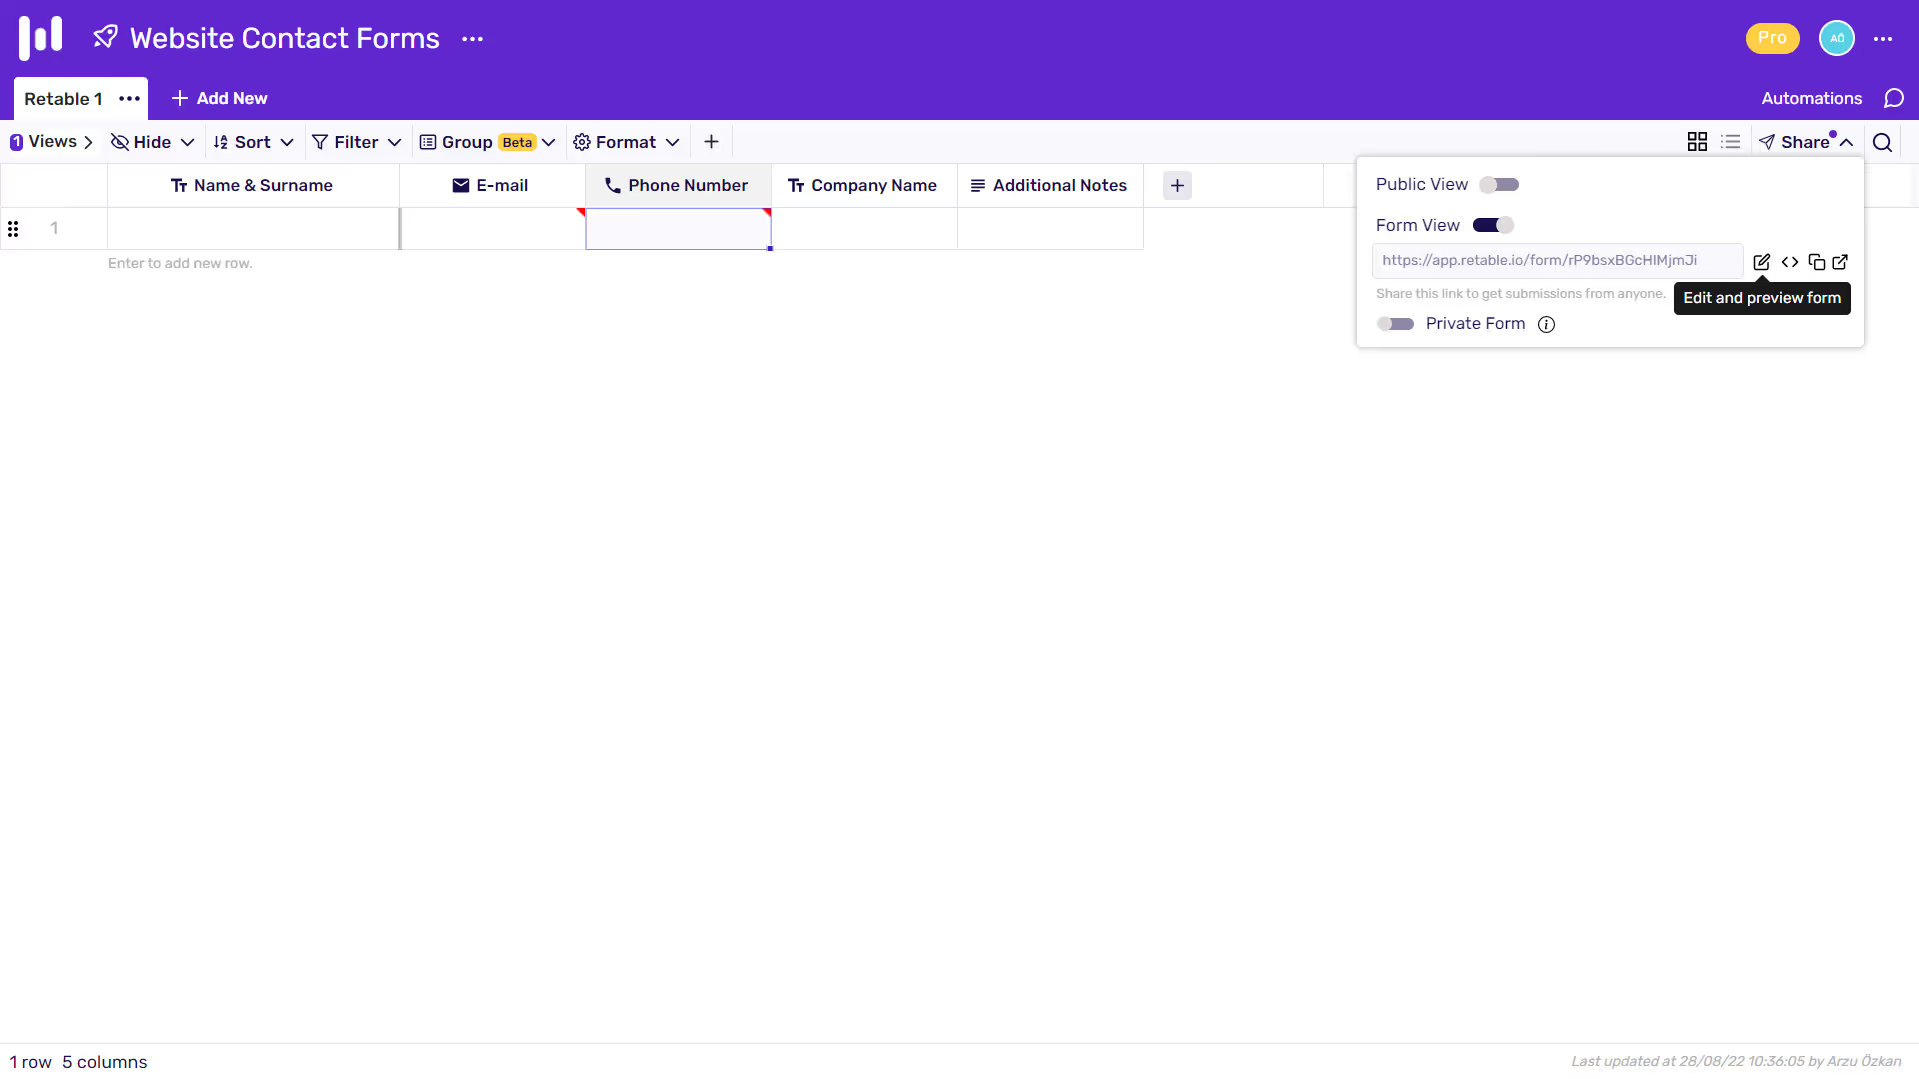
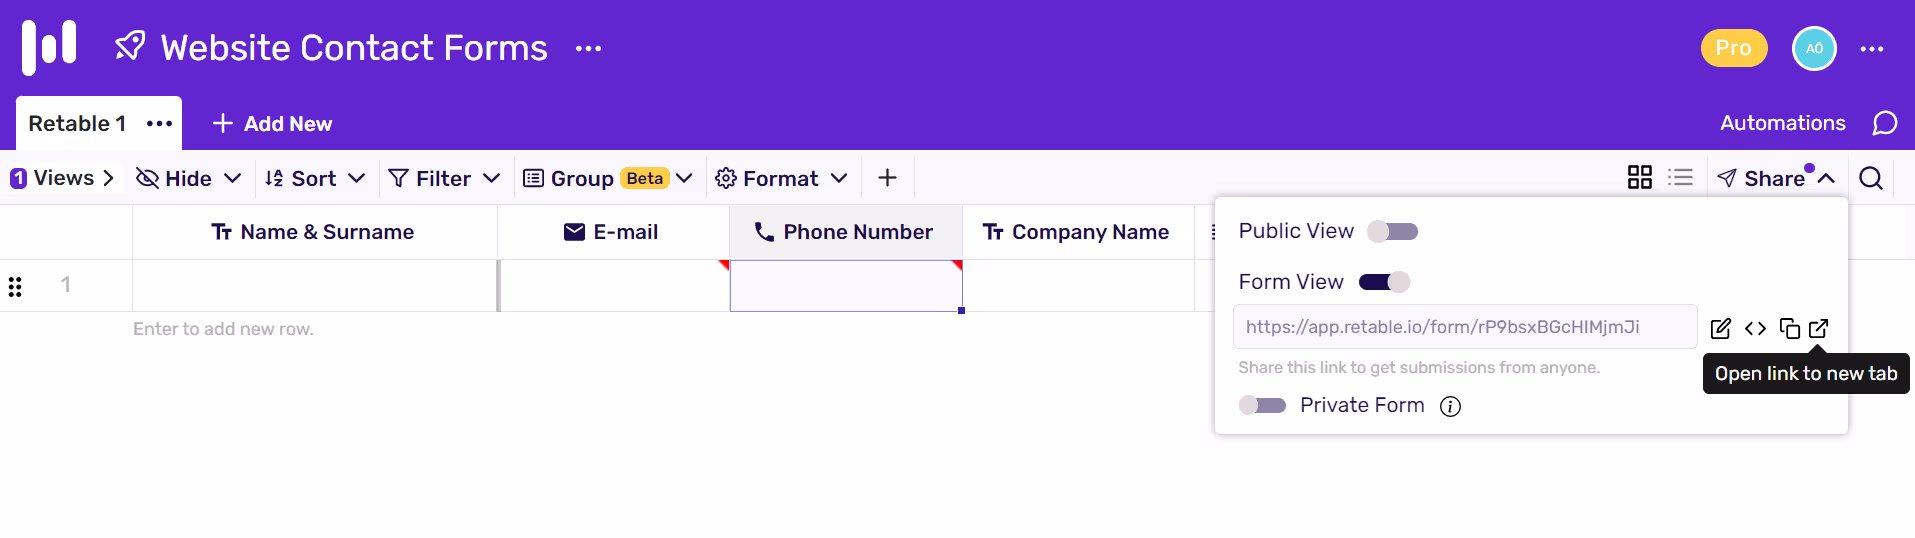
- Click the "Share" button in the upper right corner of your table.
- Activate the "Form View" toggle.
- Click the "Edit and Preview Form" icon.
Customize Your Form
- Specify your form's title and add a form description if you wish.
- Add a background image by clicking the "Cover Image" button from the right menu.
- Check your questions, you can change the name of your questions if you want.
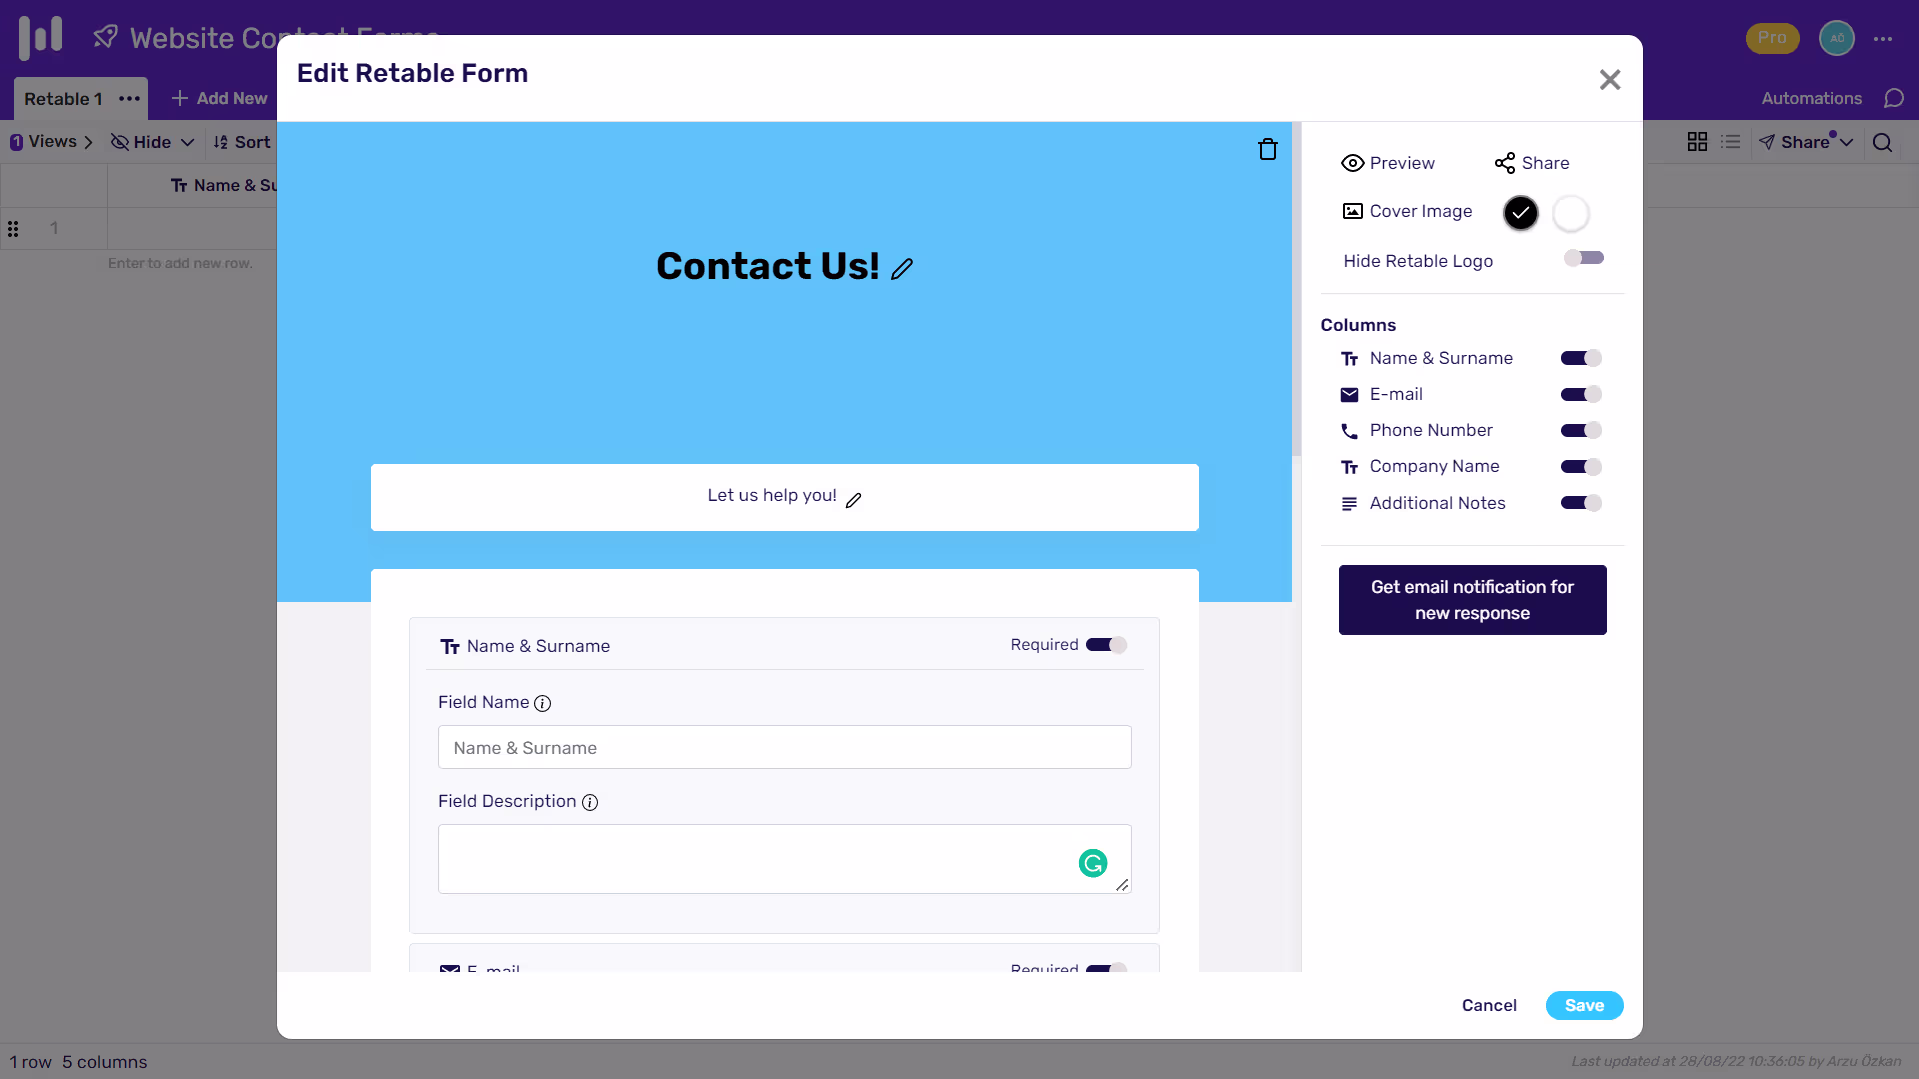
PS: When you change the name of your questions, the column names in your table do not change, only the question names that appear in the form. Then, if you wish, you can add descriptions to your questions to help those who fill out the form.
- You can set any questions you want as required or optional.
- You can hide any questions from the "Columns" category in the menu on the right side of the online form.
PS: So, you can hide questions that you do not want to appear on the form. Use Case Example; If you add a "Collaborator" column to your table, you can assign the form responses to your teammates, so you can identify your teammates who need to take action on the form responses. But you do not want this column to appear to people who fill out the form. So, you can hide this column from your online form. Or, if you want to add notes about the people who filled out the form, you can add a text column named "Notes" and hide this column from your online form. Thus, people who fill out the form cannot see the notes column.
- Now, you are ready to save your form! Click the “Save” button.
If you want to receive email notifications for form responses, you can set up automation for this.

- Click the "Get email notification for new response" button. Then the automation pop-up will open.
- Give your automation a name. For example; You can say New Contact Form Response.
- Select a trigger type. You can select the "when form submitted" option to get an email notification when your form is submitted.
- Select the table where you create your form questions.
- Add an action. For example, you can select the "Send mail" option.
- Then specify the email address, subject line, and email content.
- Now, you are ready to create automation. Activate the automation toggle above the pop-up window and save your automation.
Preview Your Online Form
- Preview your form for one last check at how it will look to people.
- Click the "Share" button in the upper right corner of your table.
- Click the "Open link to the new tab" icon
- Your form will open directly in a new tab.
Now that everything is okay, we can embed your form on your website.
Get Embedding Code
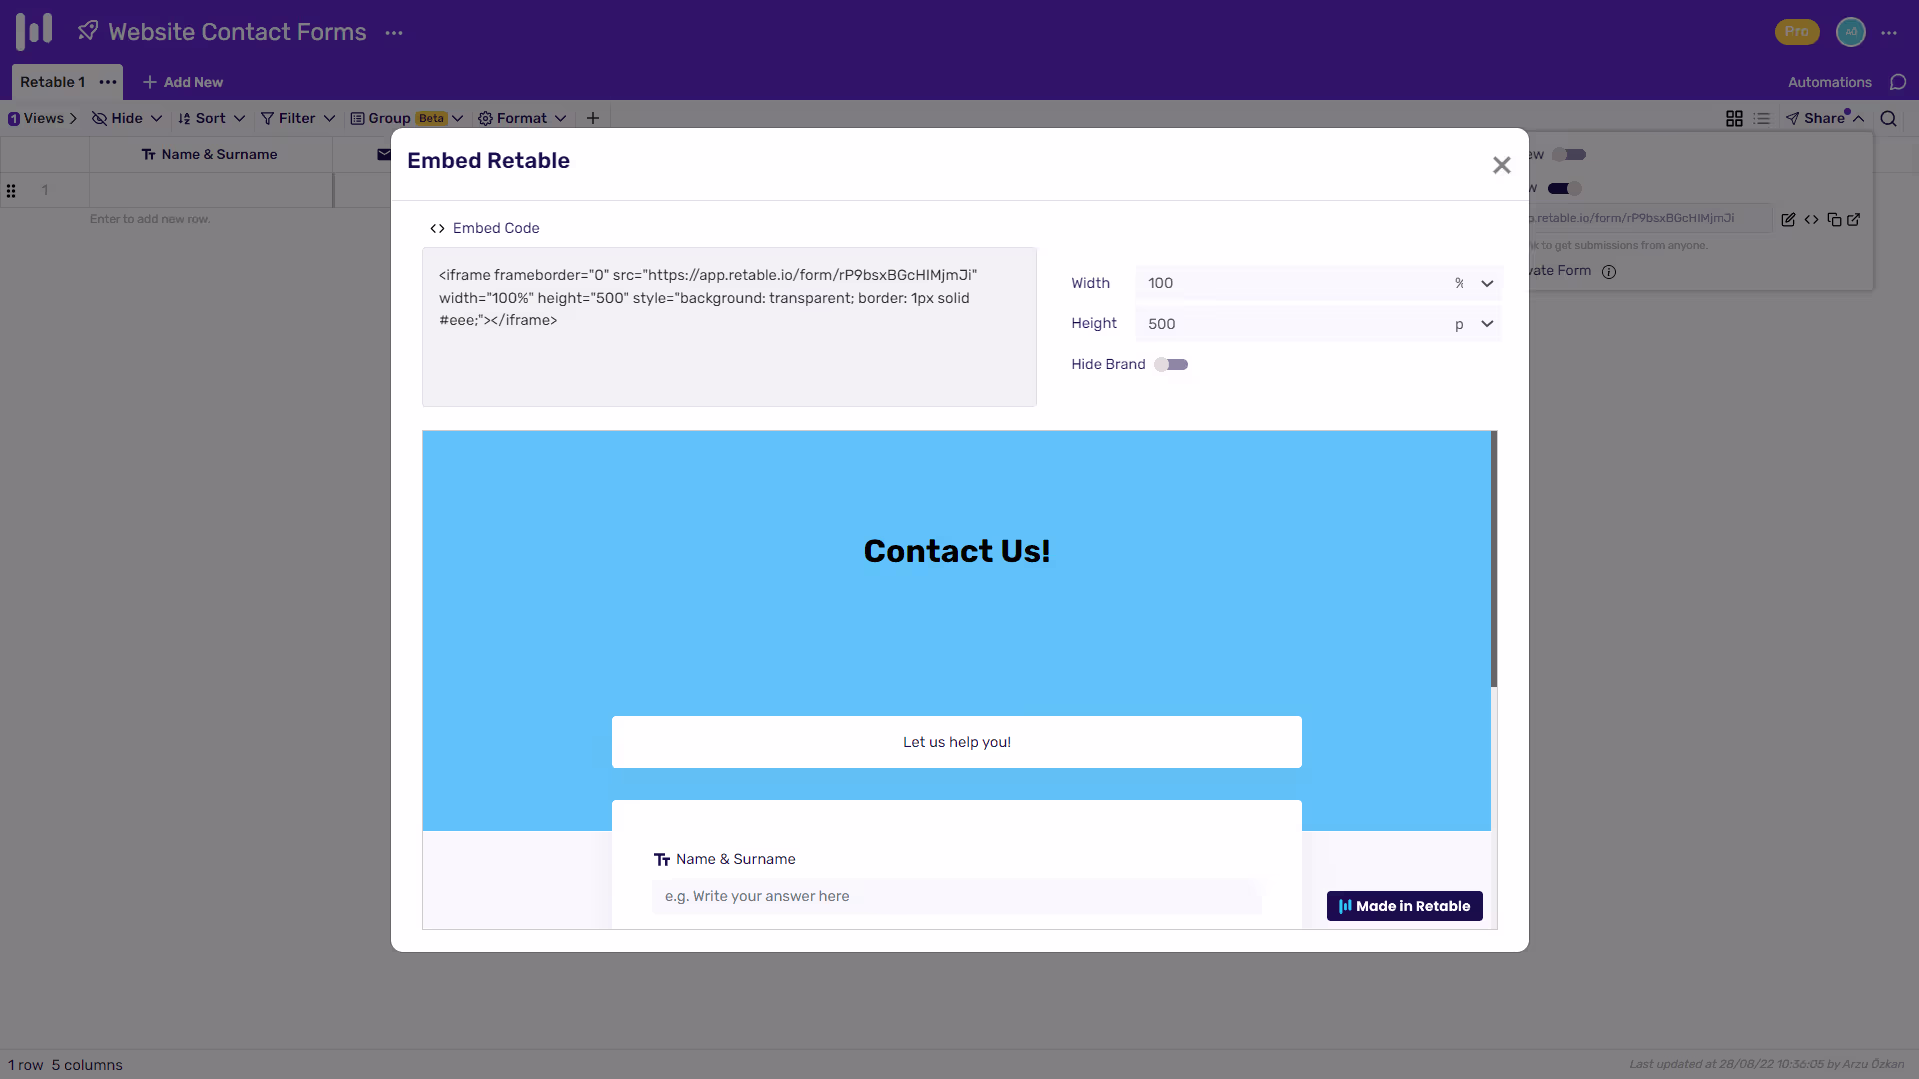
- Click the "Share" button in the upper right corner of your table.
- Click the “Embed your form on your webpage” icon. Then the embed pop-up window will open.
- Directly copy the code to paste it to your website. If you want, you can also change the width and height of your form.
Add an Embed Element in Webflow
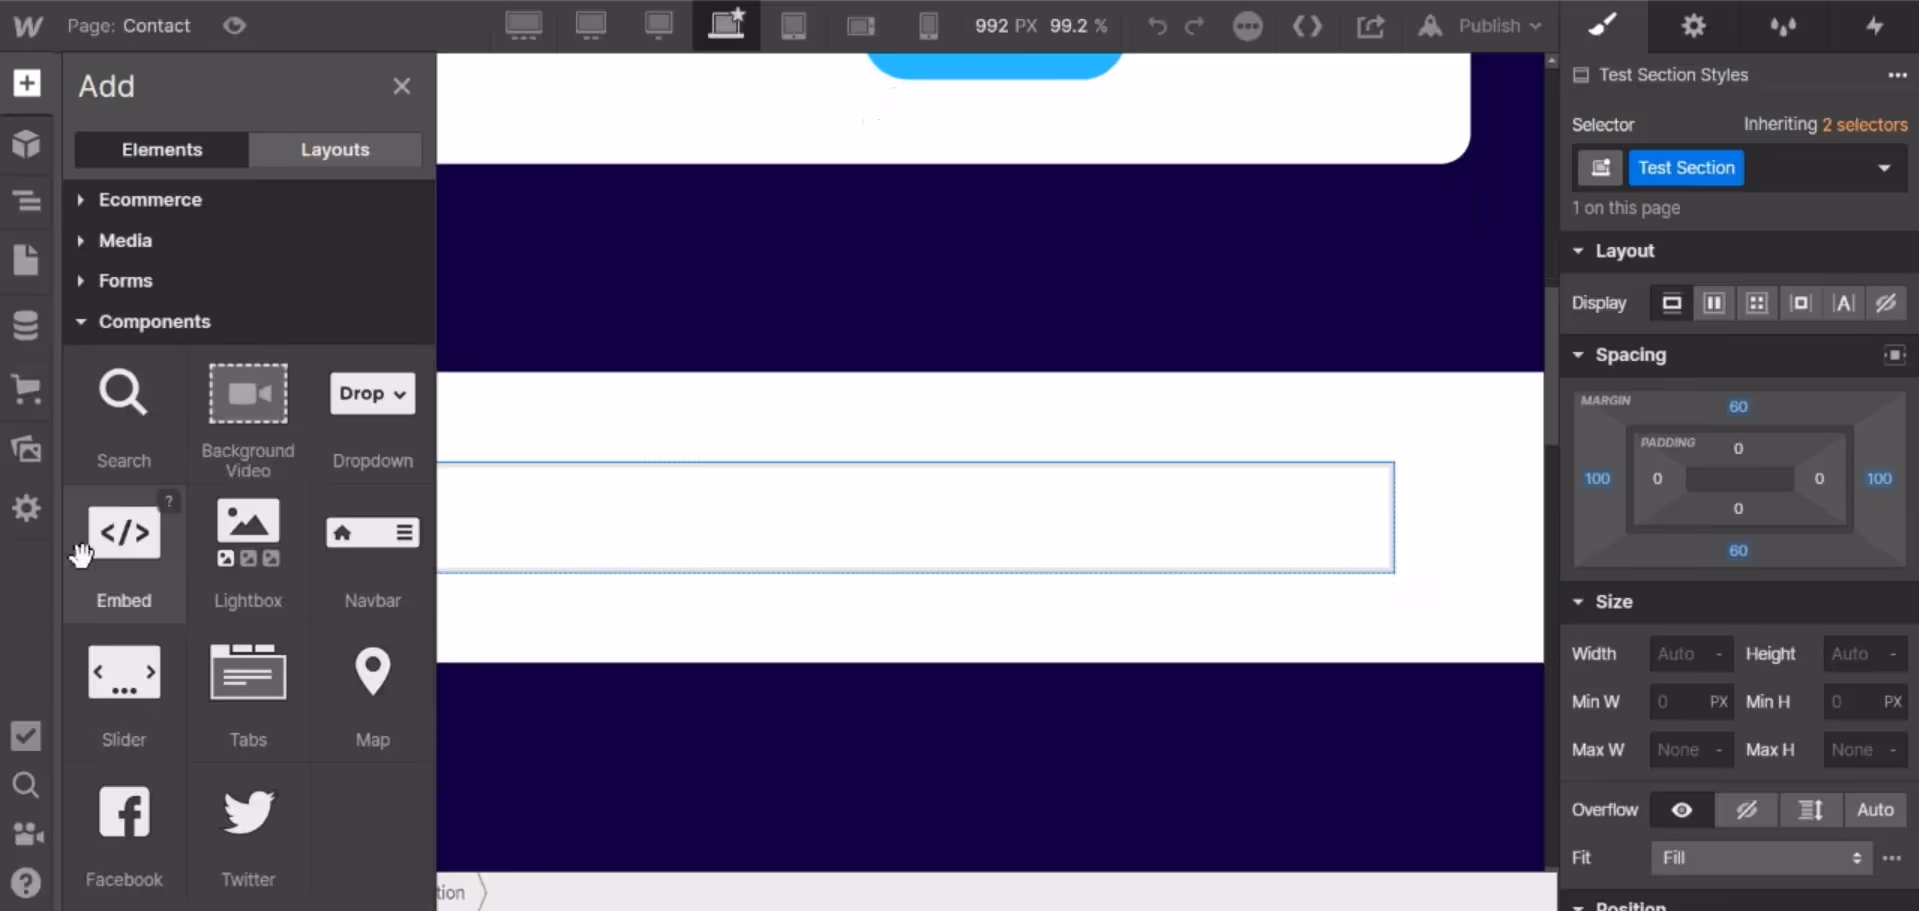
- Navigate to the page where you want to integrate your form into your Webflow interface.
- Click the plus sign from the left toolbar.
- Under components, drag an embed element into your design.
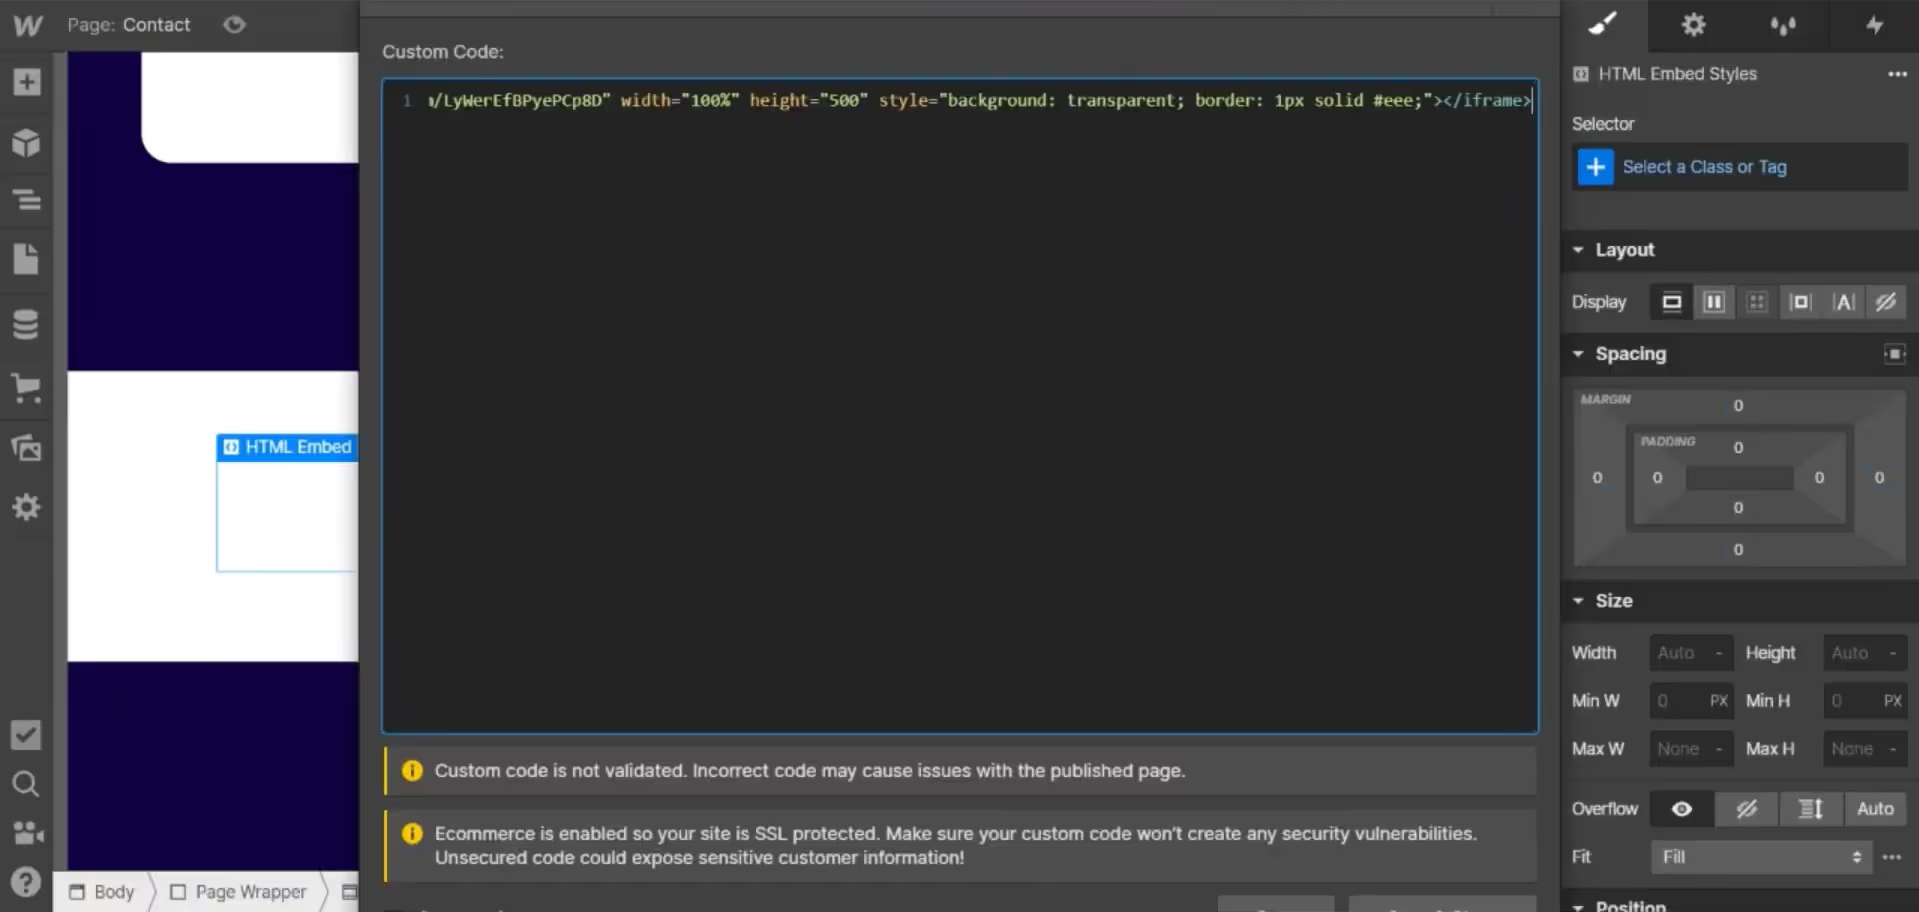
Paste the Embedding Code
- Use CTRL/CMD + V to paste the code snippet that you copy from Retable to the pop-up window up.
- Then save and close.
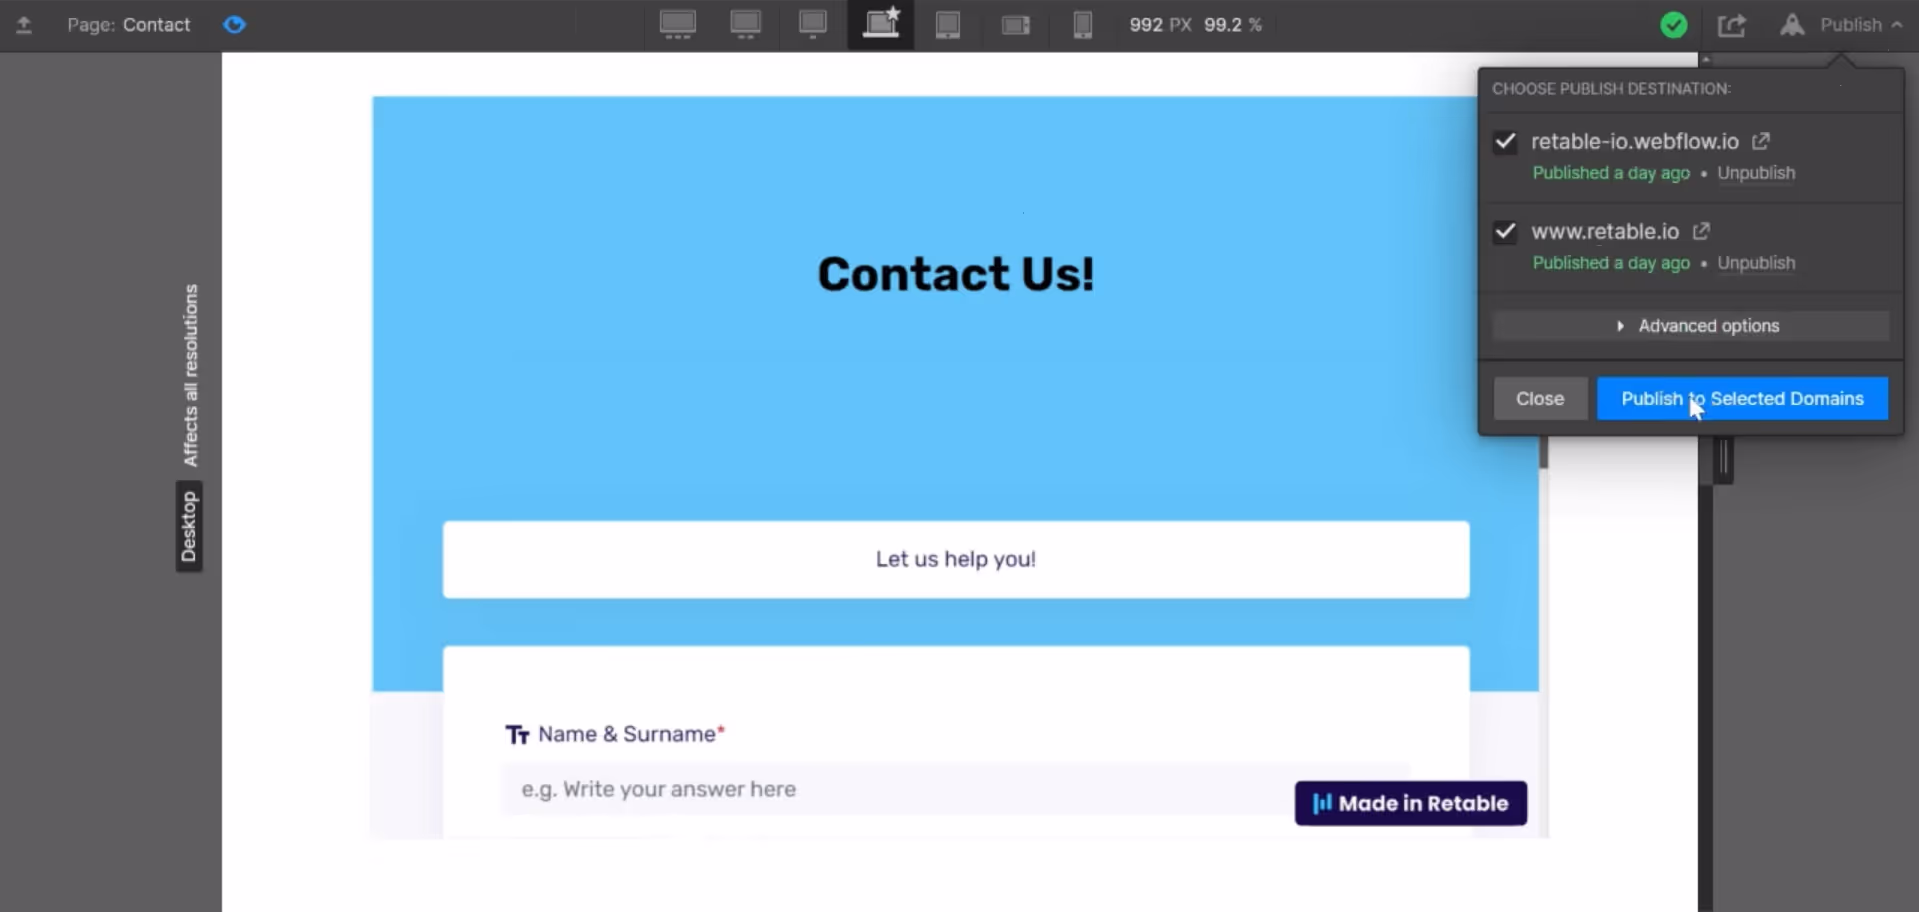
Register and Publish Your Website
Check the preview of your form and if everything is okay publish your site. And that's all, you have embedded your Retable online form to your Webflow site! All your form data will be sent directly to your online spreadsheet now.
You can also apply this method to other websites. You can now embed online contact forms on your website in seconds and see the form responses in your online spreadsheets in real-time.
Thanks to Retable's team management and collaborative data management solutions, you can collaborate with your team and turn the leads into customers. You can also find some niche features on Retable. Remember that this is not just an online spreadsheet or online form creation tool. Super niche features such as Excel dark mode are also waiting for you in Retable! 🎯
So, what else can you use Retable's forms for? Actually, there's no limit, but let's look at together!
more
Related Resources


Create your smart data management solution
Plan, track, and analyse with your ease. Transform your data with an all-in-one platform, collaborate with your teammates.
Try for free!