.avif)
Create your no-code CRM app with Budibase and Retable integration
Benefit from the power of Budibase and Retable integration to effortlessly create your custom no-code CRM application! This seamless integration empowers you to manage and analyze customer data in Retable and utilize Budibase for intuitive app development, streamlining your CRM processes like never before.
.avif)
In today's world, managing customer relationships is key for any business, but not everyone knows how to code. For businesses seeking robust solutions, implementing a cloud CRM can offer enhanced accessibility, data security, and seamless integration with existing processes, ensuring efficient client management. That's where no-code platforms like Budibase and Retable come in. They let you create your own CRM app that fits your business perfectly, without having to write a single line of code. This makes things a lot easier and faster, helping you keep up with your customers' needs and making your business run smoother.
The only limit to what you can do with the Retable and Budibase integration we recently launched is your imagination. To shape your imagination, we will show you how you can build a no-code CRM app with Retable and Budibase integration. Let's take the first step together before you start to learn how to do more!
Table of contents
- What is Budibase
- What is Retable
- Retable and Budibase integration
- Create a CRM app with Budibase and Retable integration
What is Budibase
Budibase stands out as a robust no-code platform, enabling users to create dynamic applications without the need for traditional coding skills. Budibase provides a versatile solution for streamlining the application development process. What sets Budibase apart is its seamless integration with Retable as a data source, allowing users to easily tap into auser-friendly data repository and enhance the functionality of their applications. This collaboration ensures a reliable and efficient data management system, empowering users to leverage the potential of the no-code revolution and experience a more intuitive and efficient development journey.
What is Retable
Retable is a cloud-based data management platform that combines the simplicity of a spreadsheet interface with the complex functionalities of a database. It enables you to organize your work, projects, and data into customizable tables that can support various types of content such as attachments, links, and checklists. Retable's versatile nature makes it suitable for a wide range of applications, from project management and customer relationship management (CRM) to inventory tracking and event planning, offering integrations with other apps and automation of workflows to enhance productivity and collaboration among teams.
Retable and Budibase integration
The integration between Retable and Budibase is aimed at enhancing data management and application development capabilities for users. Retable, known for its user-friendly online spreadsheet capabilities, allows users to organize and manipulate data efficiently. Budibase, on the other hand, is a powerful no-code platform that enables the rapid creation of custom web applications. By integrating these two platforms, you can leverage Retable's robust data organization and analysis features within Budibase's application development environment. This synergy simplifies the process of building data-driven applications, allowing you to seamlessly connect their structured data in Retable with the customizable, interactive applications you develop in Budibase, thus facilitating more streamlined workflows and improved productivity.
Use Retable as data source or two way workflow
Budibase users can utilize Retable's public APIslimitlessly by selecting HTTP Request as their data source. This integration enables seamless access to all public APIs provided by Retable within Budibase applications. With HTTP Request, users can effortlessly make requests and retrieve data from Retable's APIs, facilitating the creation of dynamic and data-driven applications without usage constraints.

Add authentication
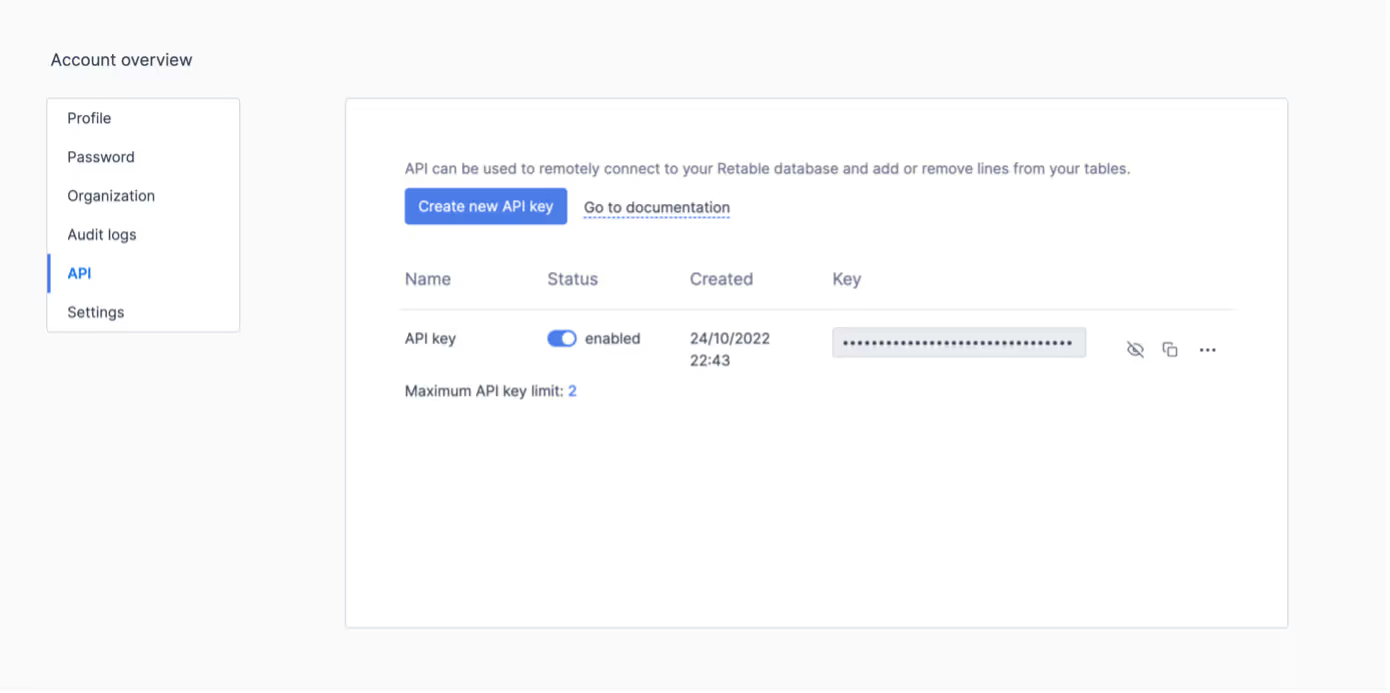
To commence, navigate to the Headers section and incorporate an "api Key." Retrieve the API key value from the "Account Overview" section on Retable. Ensure that the API functionality is activated. This serves as the authentication method foraccessing the Retable account and its associated data. Exercise discretion andrefrain from sharing the API key with any unauthorized parties.
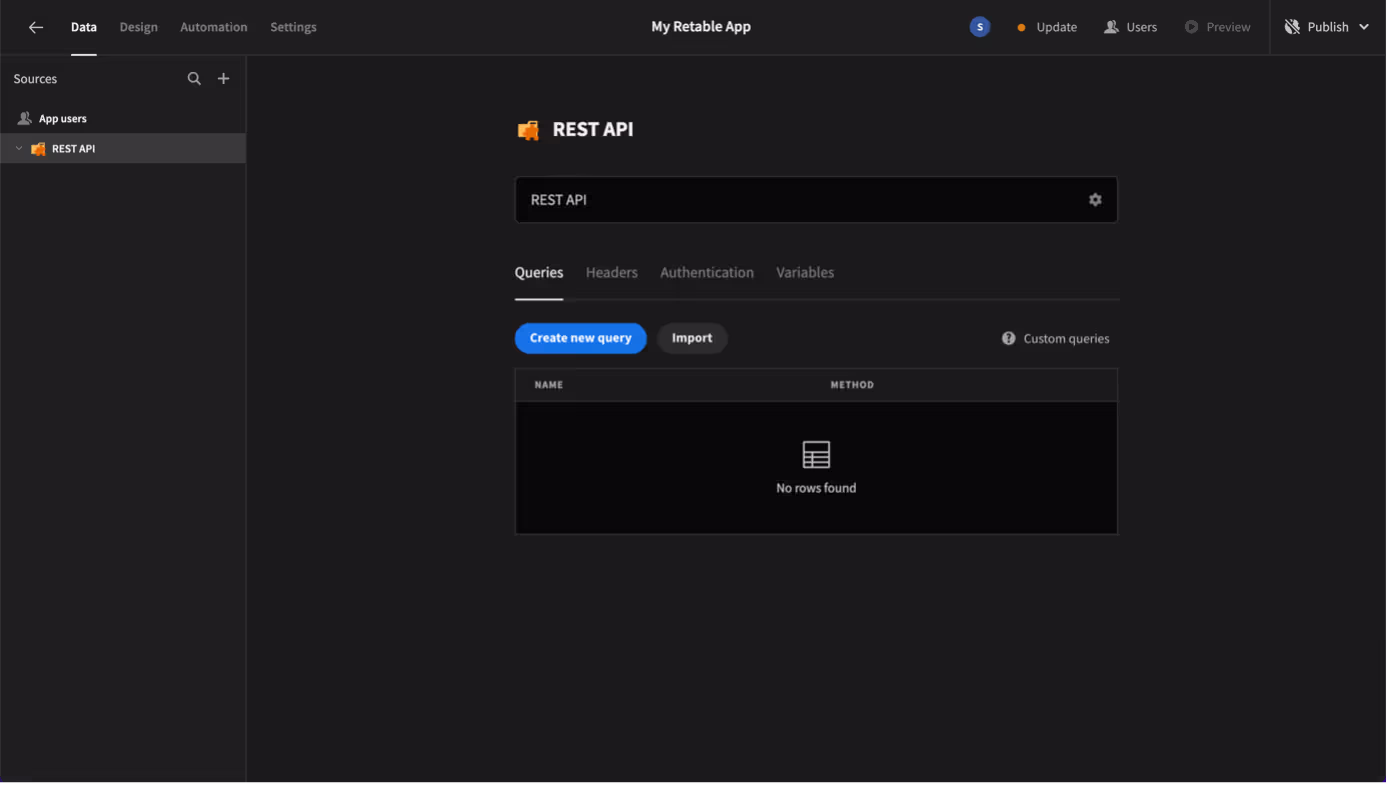
Import Retable API
The Retable Public API can be utilized through twomethods. The first approach involves using the "Import" feature.Simply click on "Import," choose the Retable Open API 3.0 Files, and the import process will be seamlessly completed. These files are accessible in the Budibase API Files section.
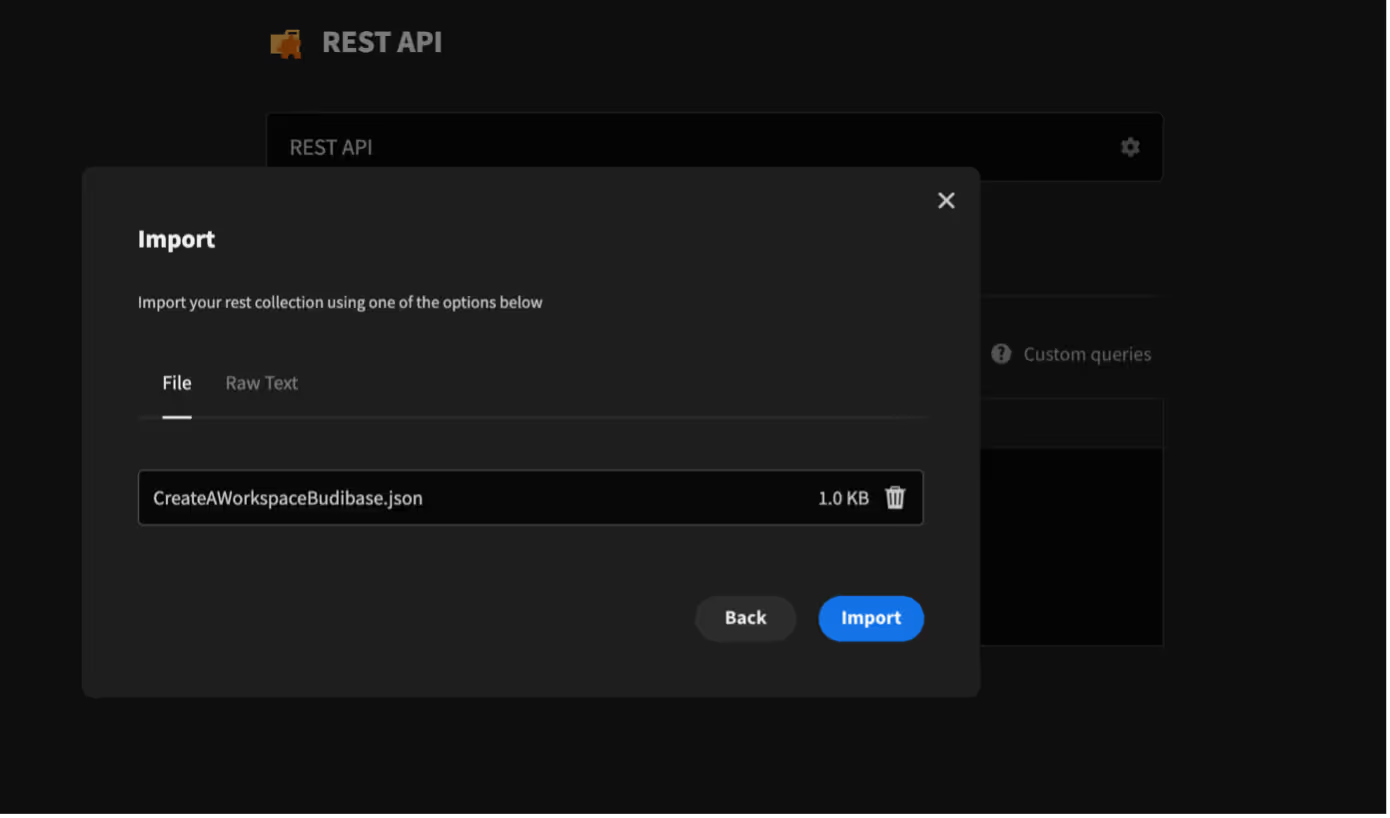
After select, click Import.

Add budibase parameter
Once the file has been imported, the major part of the setup is complete. Simply add "budibase" and "platform" within the specified parameters. This addition ensures that all the required APIs are included. Proceed to the "Params" and "Body" sections, and populate the data part accordingly.
Caution: If the "budibase" parameter is not included, the response will precisely mirror the examples provided in the user guide. However, in the event of its inclusion, individual object responses will be encapsulated within an array, and the "created_by" and "updated_by" sections will be modified to display email information instead of an object.
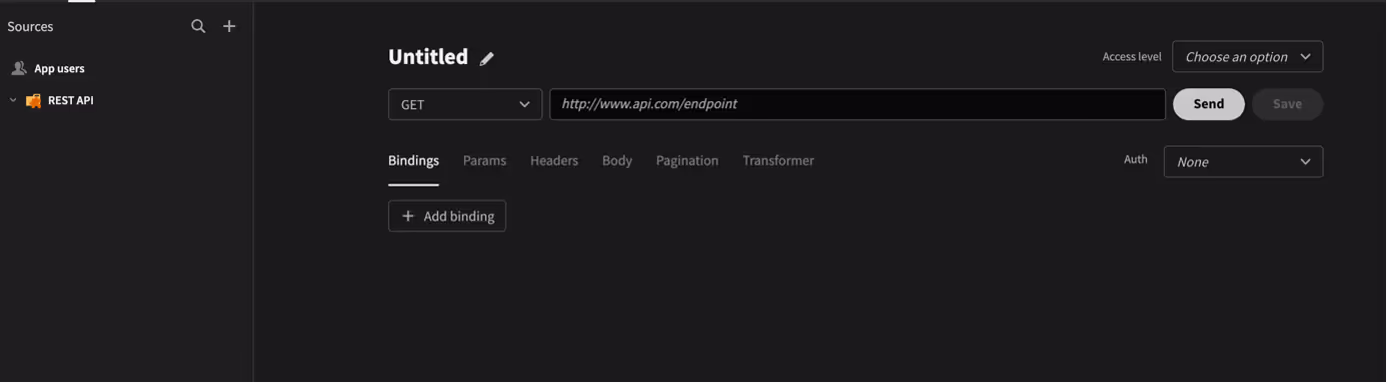
Create query manually (Optional)
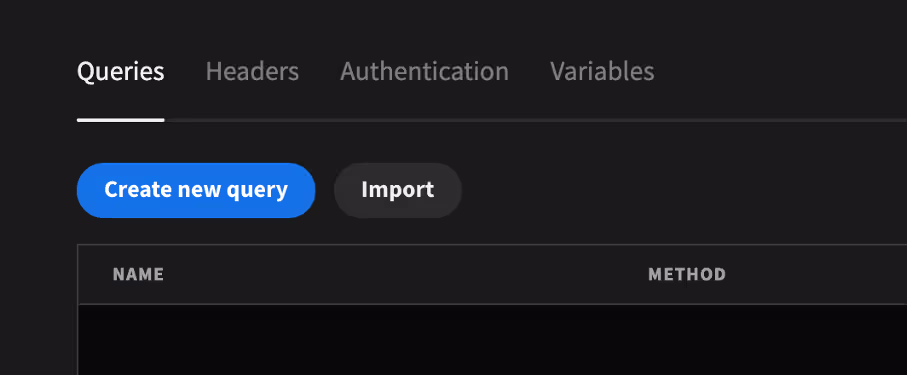
For manual inclusion of requests, and the addition of external APIs without utilizing files, click the "Create New Query" button. Proceed to fill in the essential components as needed. This allows for the direct creation and customization of queries without reliance on pre-existing files.
Create a CRM app with Budibase and Retable integration
It is possible to create simple but effective CRM applications using Budibase and Retable integration.
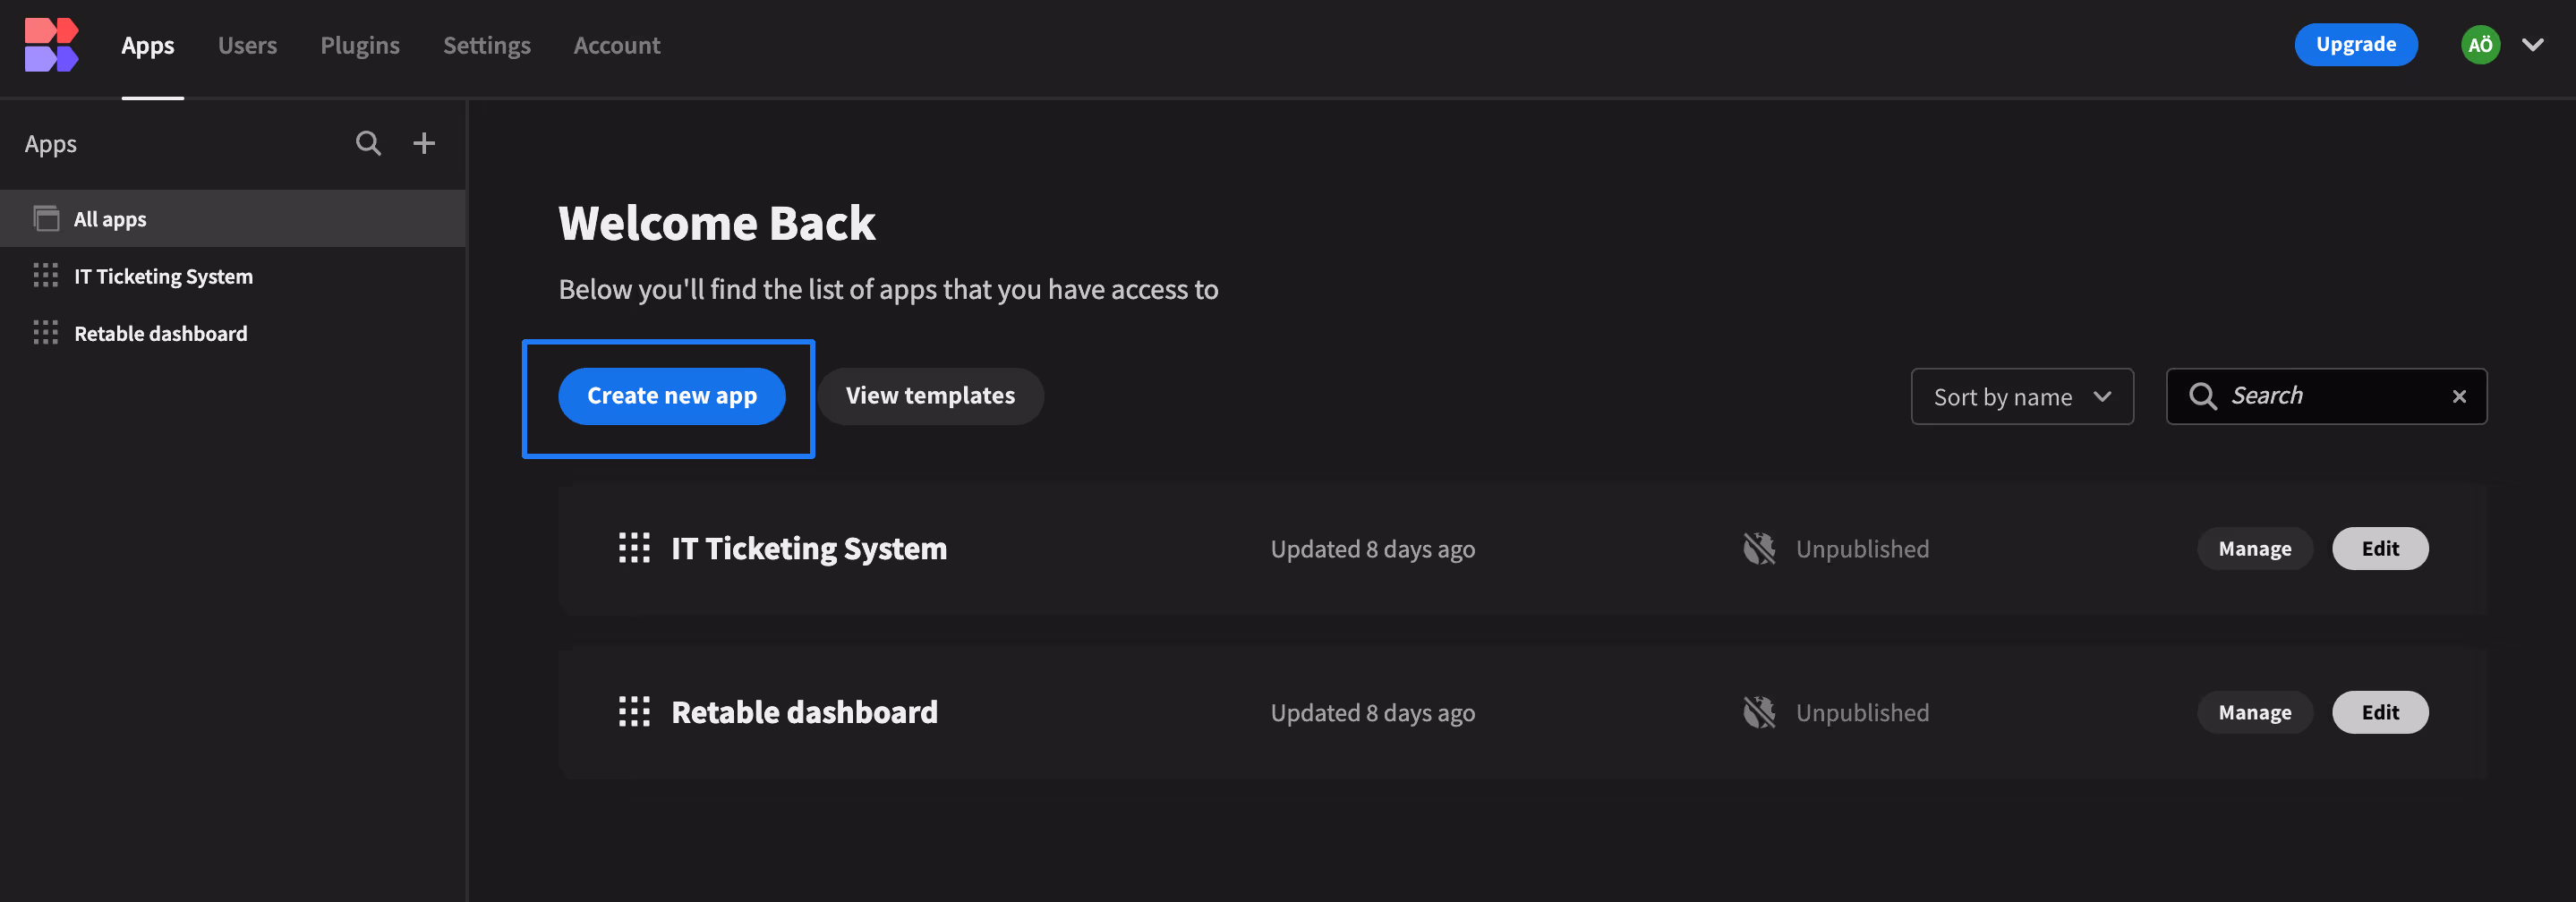
First, let's start creating the application by clicking the "Create new app" button. We can create our first application by clicking the "Start from scratch" button on the next page and typing the application name in the modal that appears.
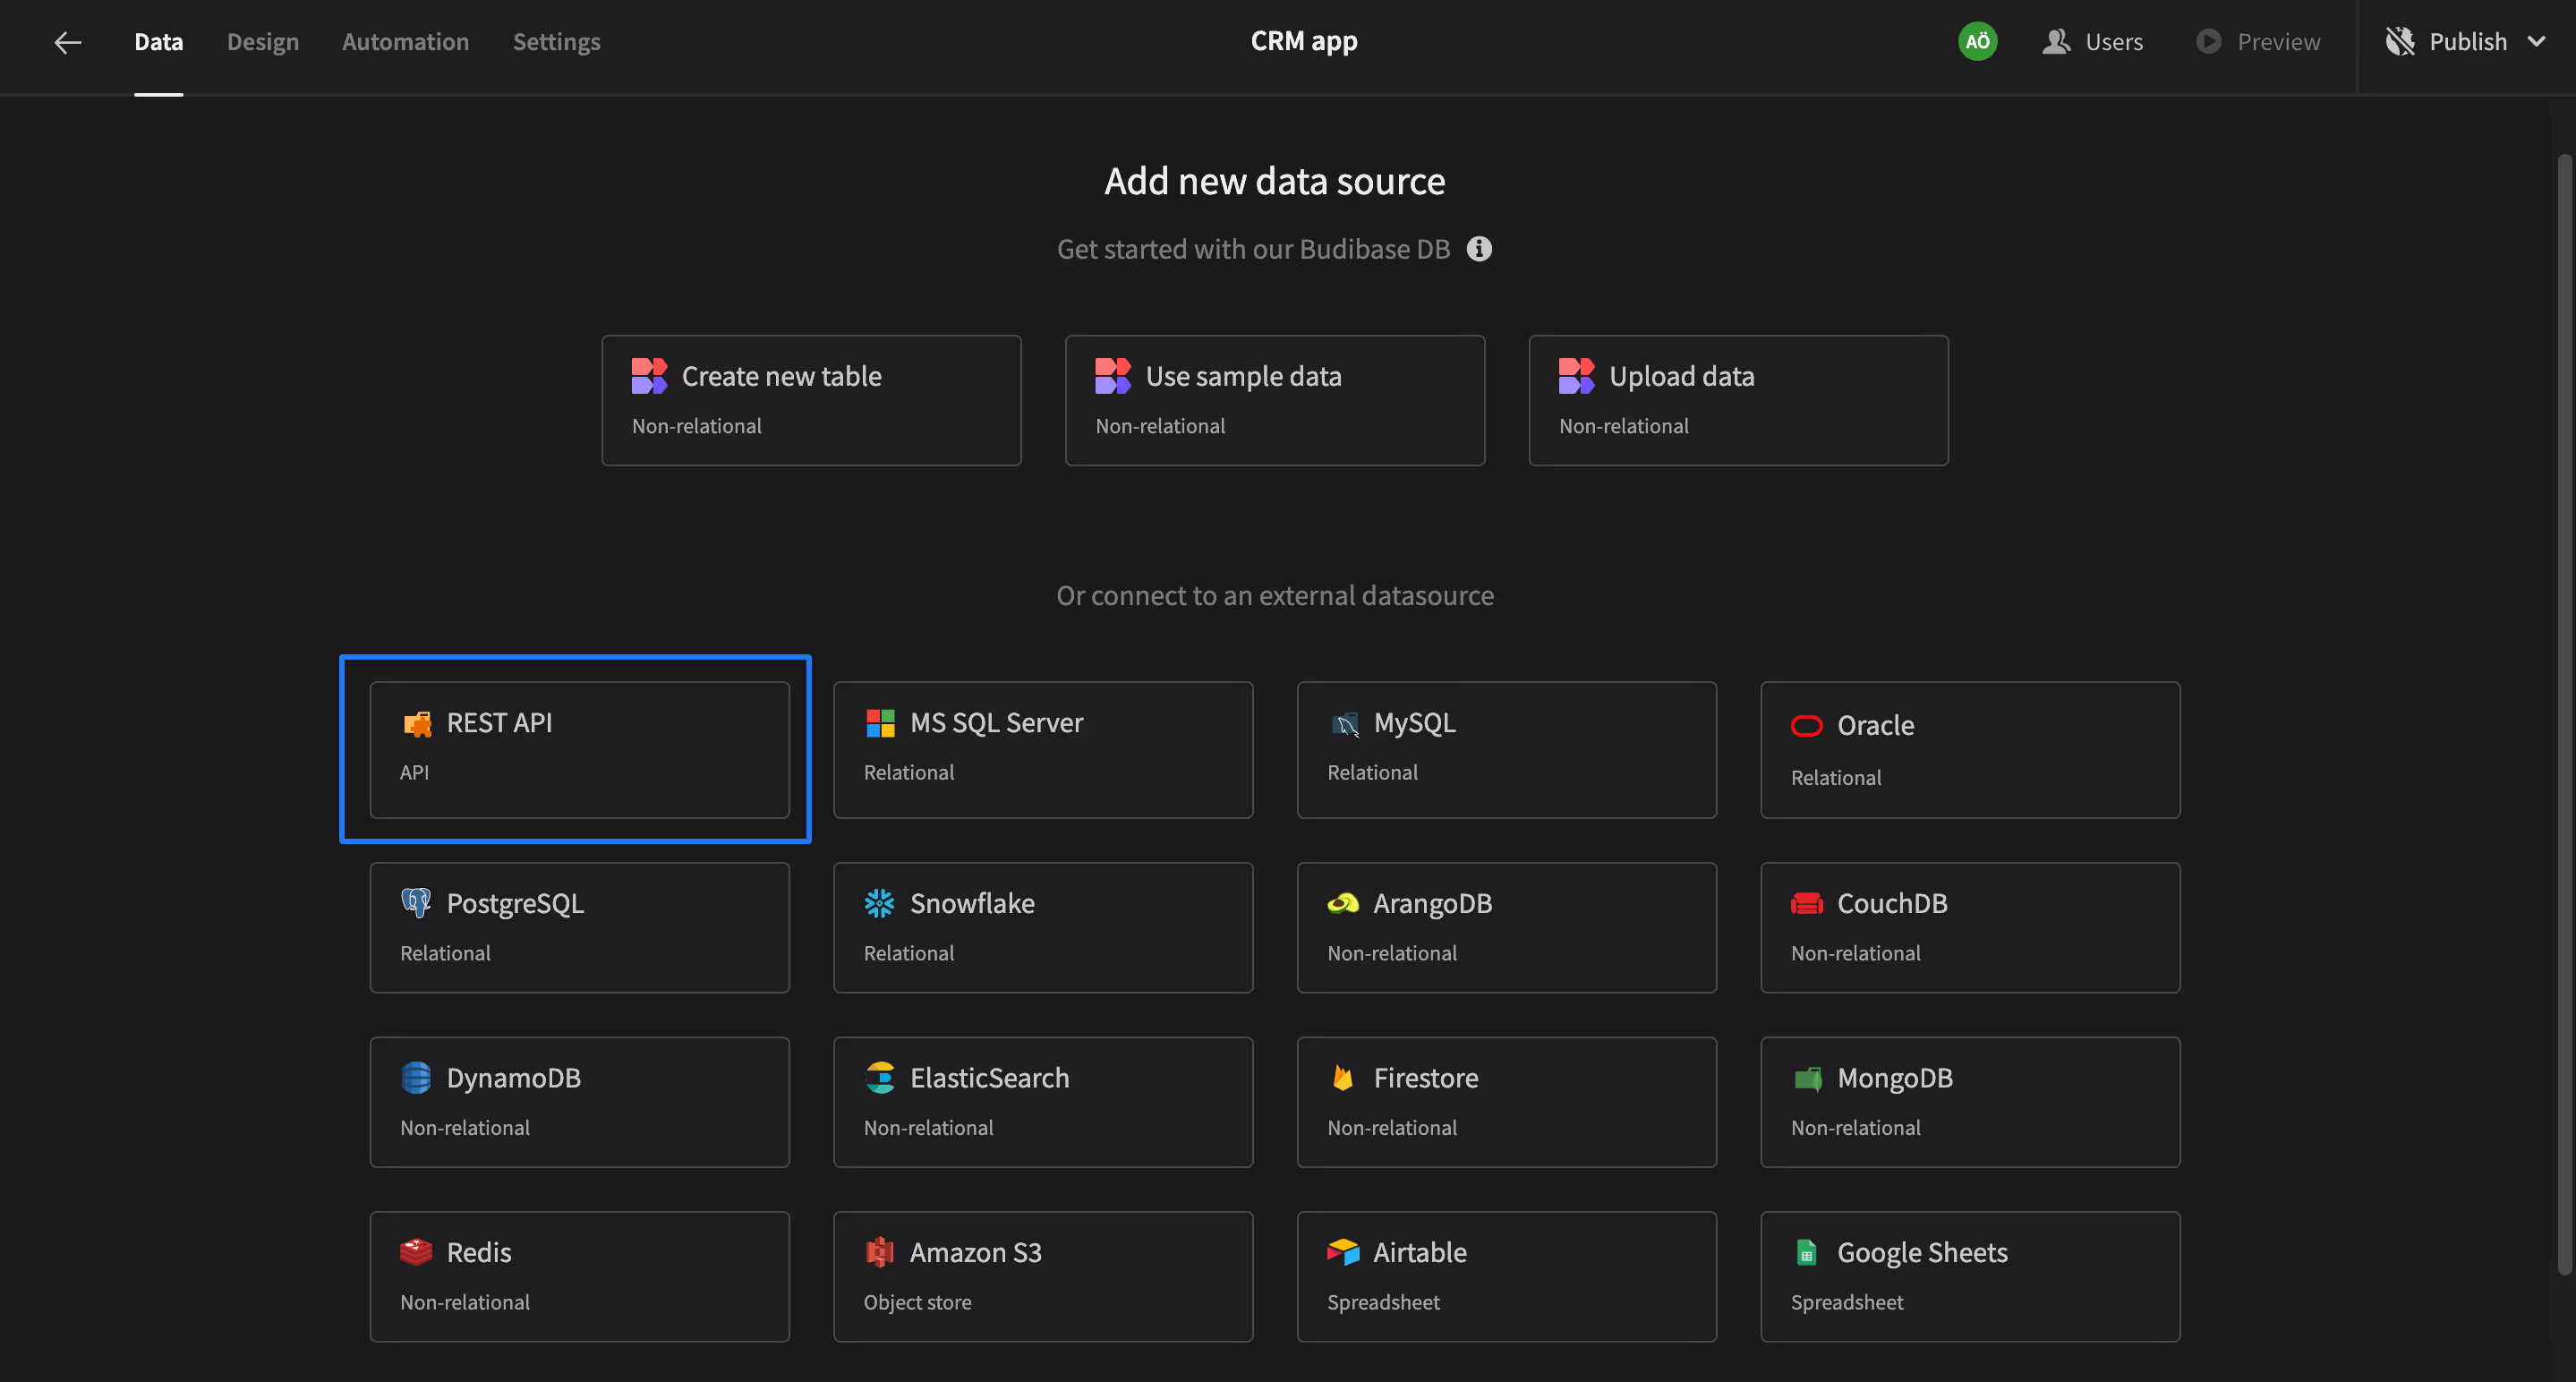
After completing these steps, we need to choose a data source that we will use in the application. We complete this step by clicking on the "REST API" option.
Now we can add different screens and elements to our application. To do this, let's click on the "Design" tab atthe top left and create a "Blank Screen". After naming our screen, we create our first screen by selecting the "Basic" access option.

Adding a table
It is quite easy to import a table in your Retable to Budibase. First, you need to send a request via the Retable API stating that you want to retrieve the rows from this table (See how to do it by clicking this link)
In order to display the data we receive with the Rest API here, we must first add a "Data Provider". To do this, we need to click on the plus button at the bottom right and find the Data Provider component in the panel that opens on the right. Now we need to tell this component which data we will transfer using the "Data" option. Here, we will use a data source that we have previously added to the REST API,and you can use the data source you created with your own information here.
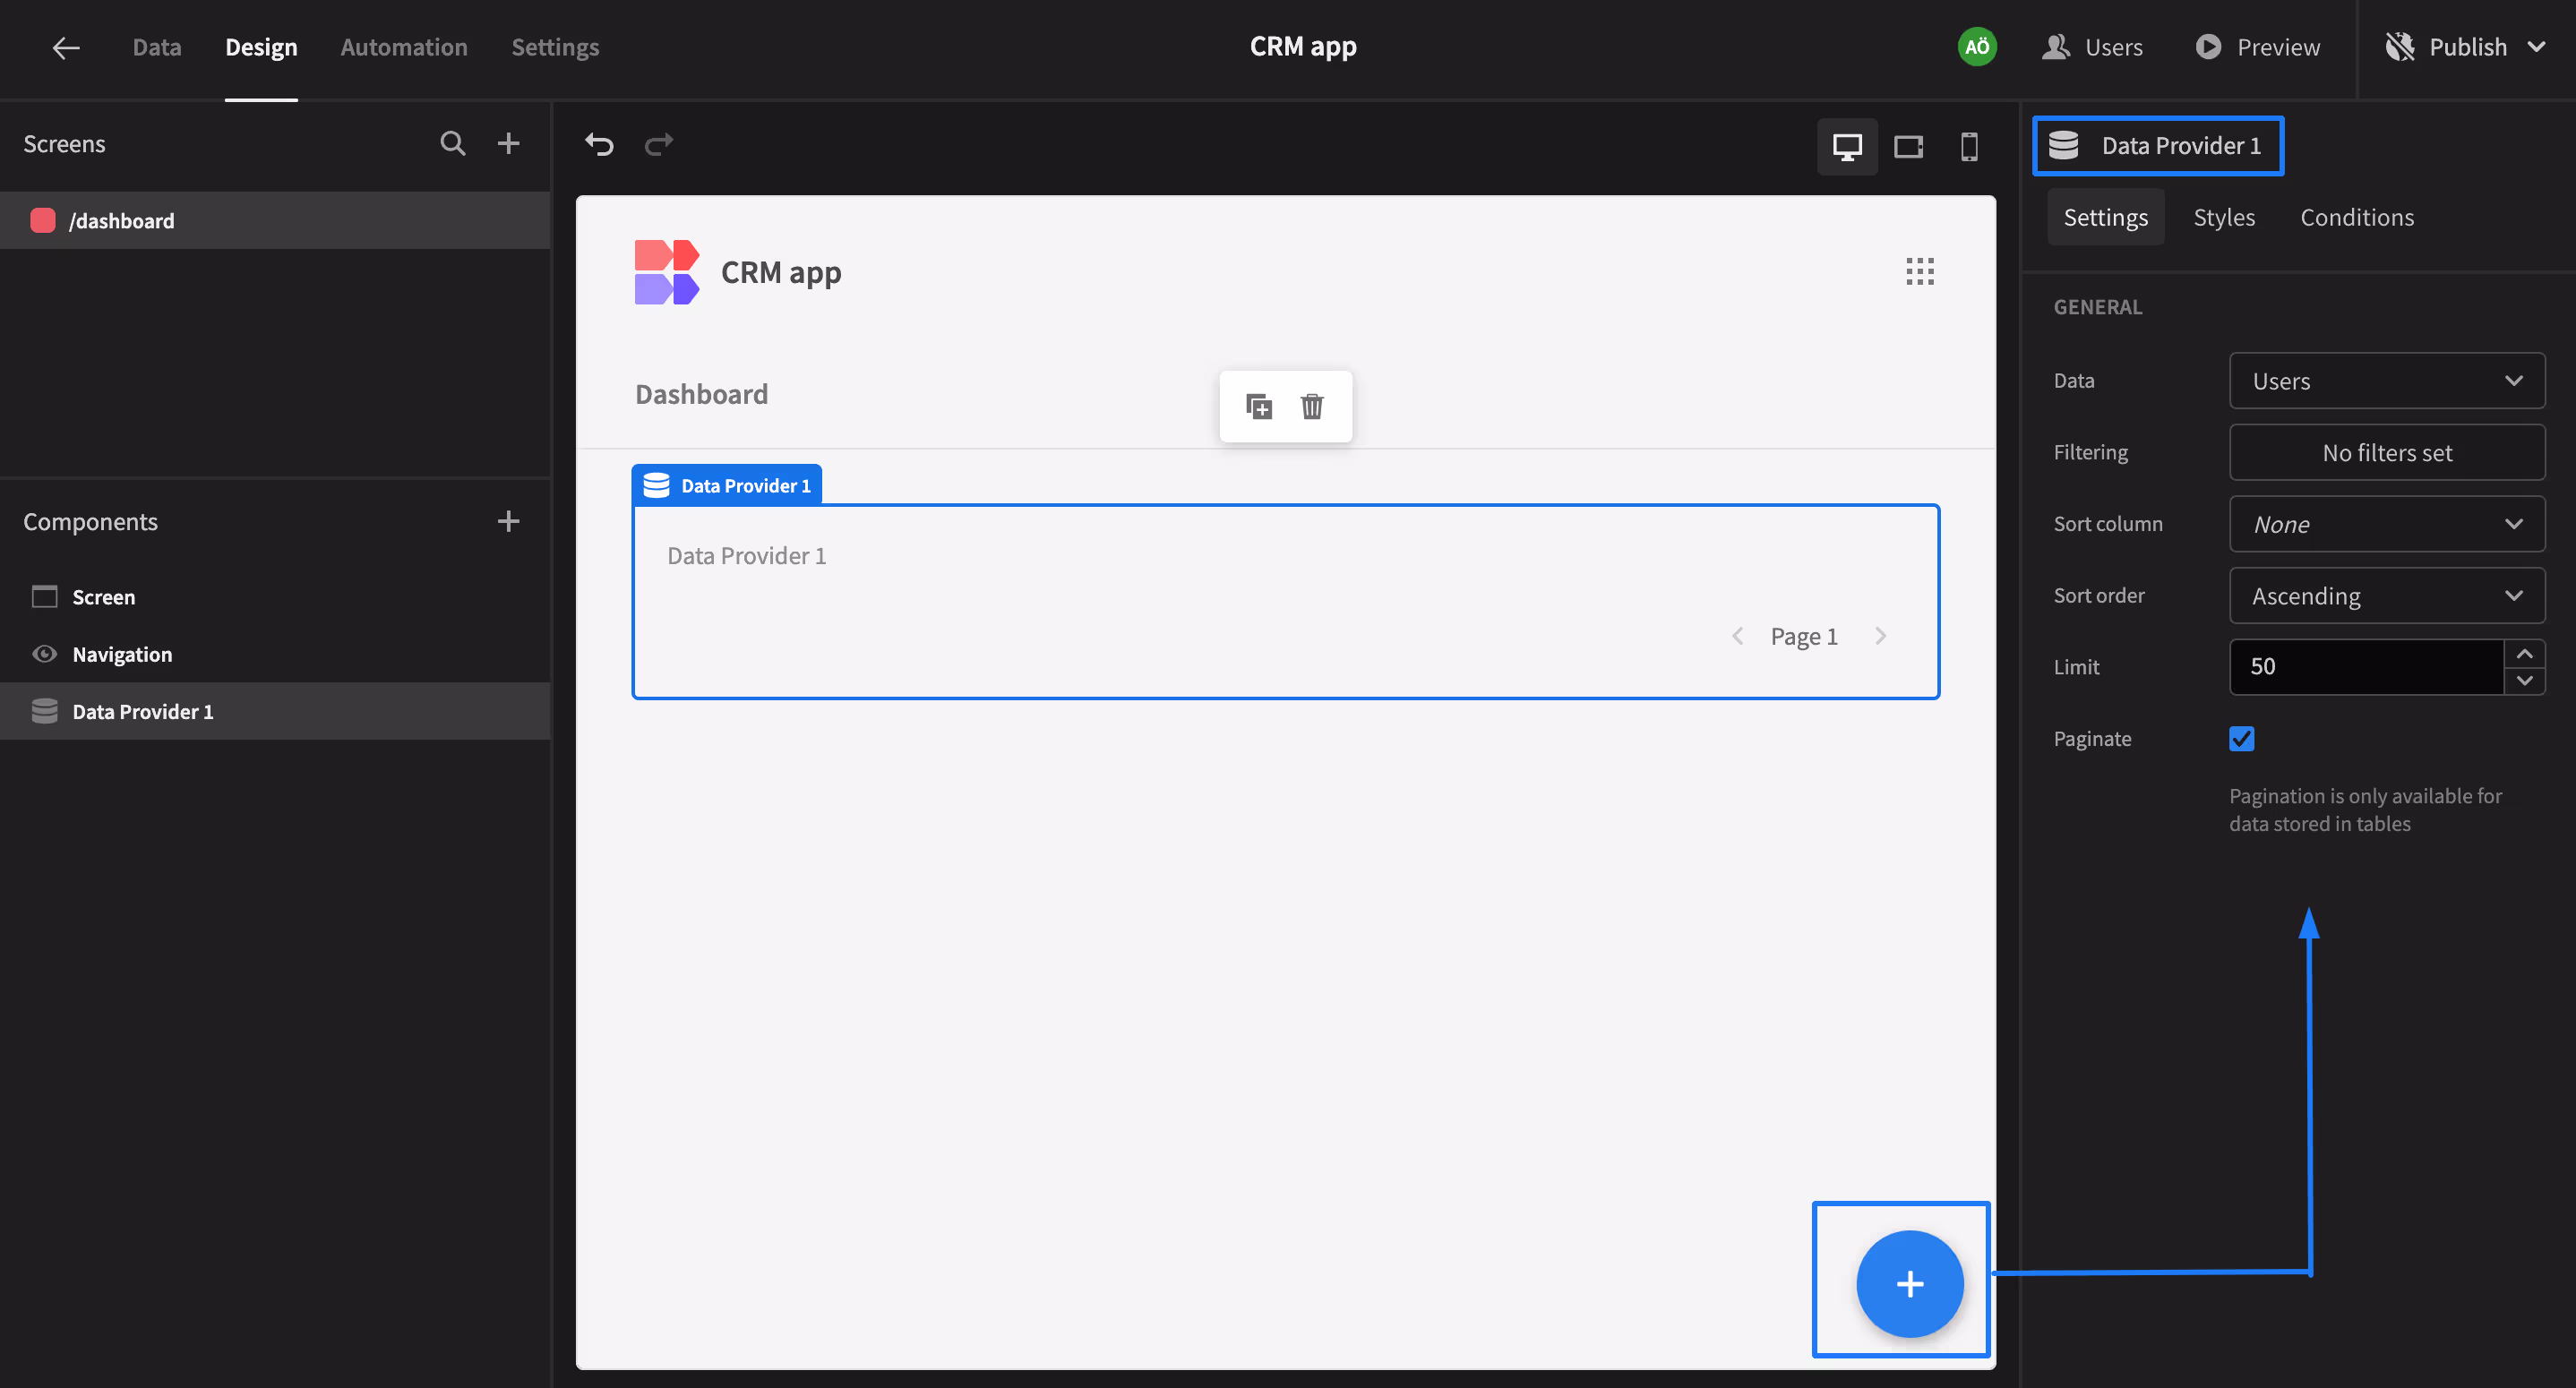
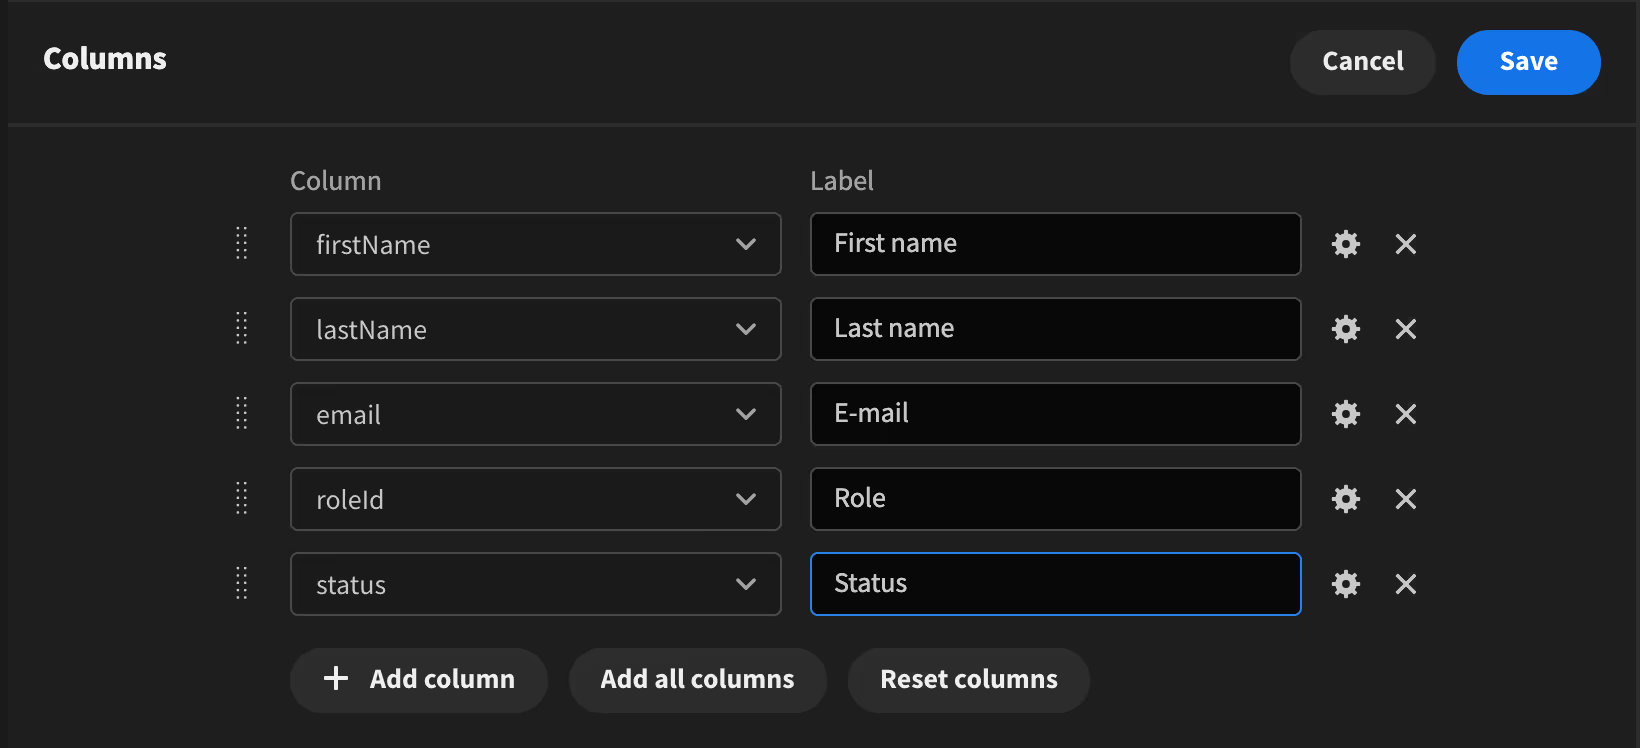
Now we can use our data here by adding a "Table" component under the Data Provider component. To do this, we need to use the "Columns" property of the Table component. First of all, let's click on the "Columns" button on the right and select the columns we want from the window opened at the bottom and click on the Save button.
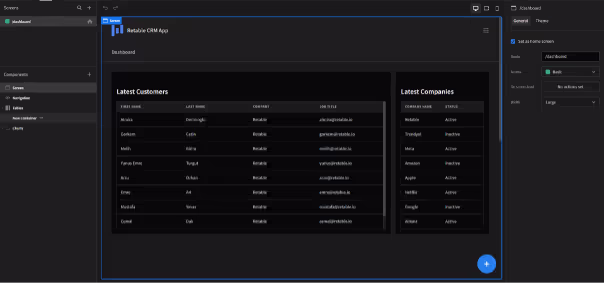
After performing this process, your table willappear on the screen successfully. (We added another table by performing the same operations)
Adding different components
We can display our data not only in the Table component but also with custom components. Now let's add a component that shows how many total customers are in our table.
To do this, let's click on the button at the bottom right and create a "Container" component. Then, let's add a Data Provider to this component as we did before, and finally, let's select adata source to be used by selecting the "Data" section on the right, which is a feature of this component.
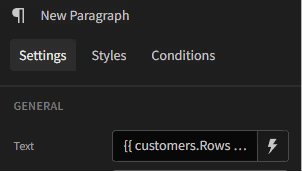
Then, add a "Headline" component that will display the title, a "Paragraph" component that will display the number of customers, and a "Link" component that will redirect to another page, into the Data Provider component. You can add a text explaining what this component is to the Text property of the Headlinecomponent. We need to write the total number of customers in the Paragraph component. We can do this by clicking the "Lightning" button next tothe text feature.
When we click on this button, we need to select a "binding" in the window that opens at the bottom. We will choose "Data Provider" again as binding.
If we click on the New Data Provider --> Rows Length buttons respectively and then click on the Save button, we will achieve the result we want.
Finally, after clicking on the Link component in the left window, add an external link to the URL input in the right window or a link to another screen in our application.
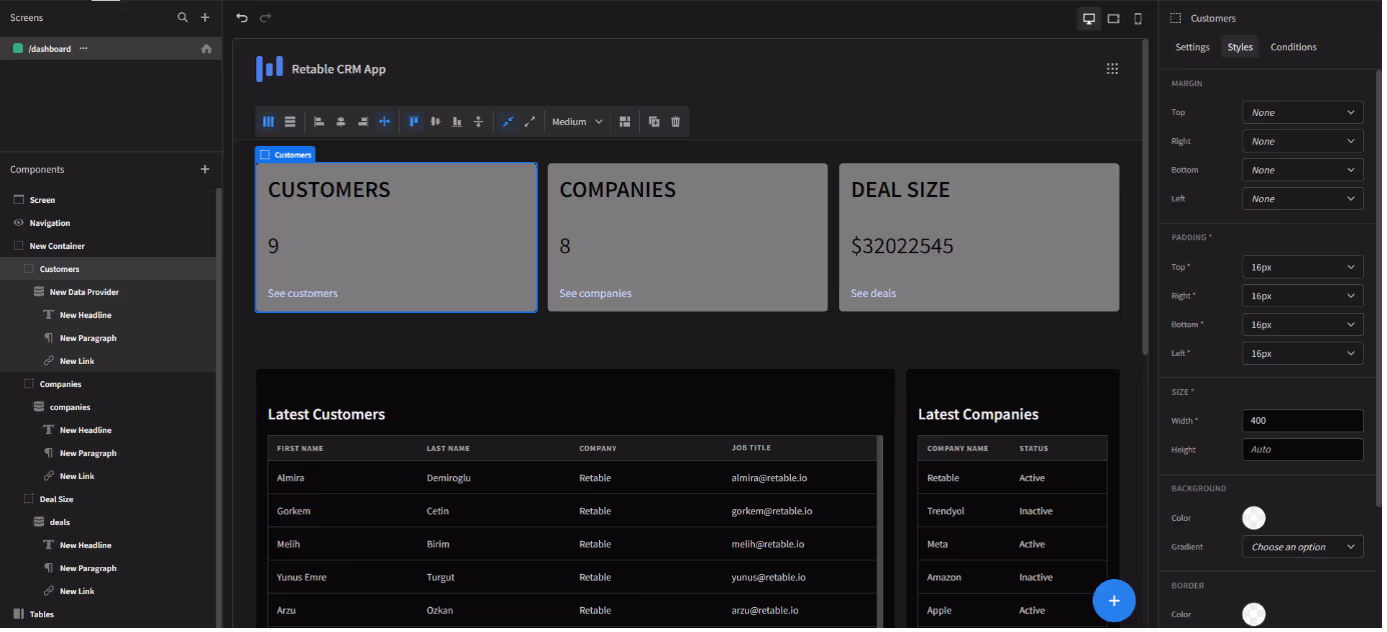
We tried to enrich the application by adding afew more different containers. You can add new Containers by following theprevious steps.
In addition, let's talk about some features inthe "Styles" tab on the right side of the last photo. Here we can give margin, padding and width properties to the components. We can also apply the styles we want to the components by clicking the "Edit custom CSS" button at the bottom of the tab.
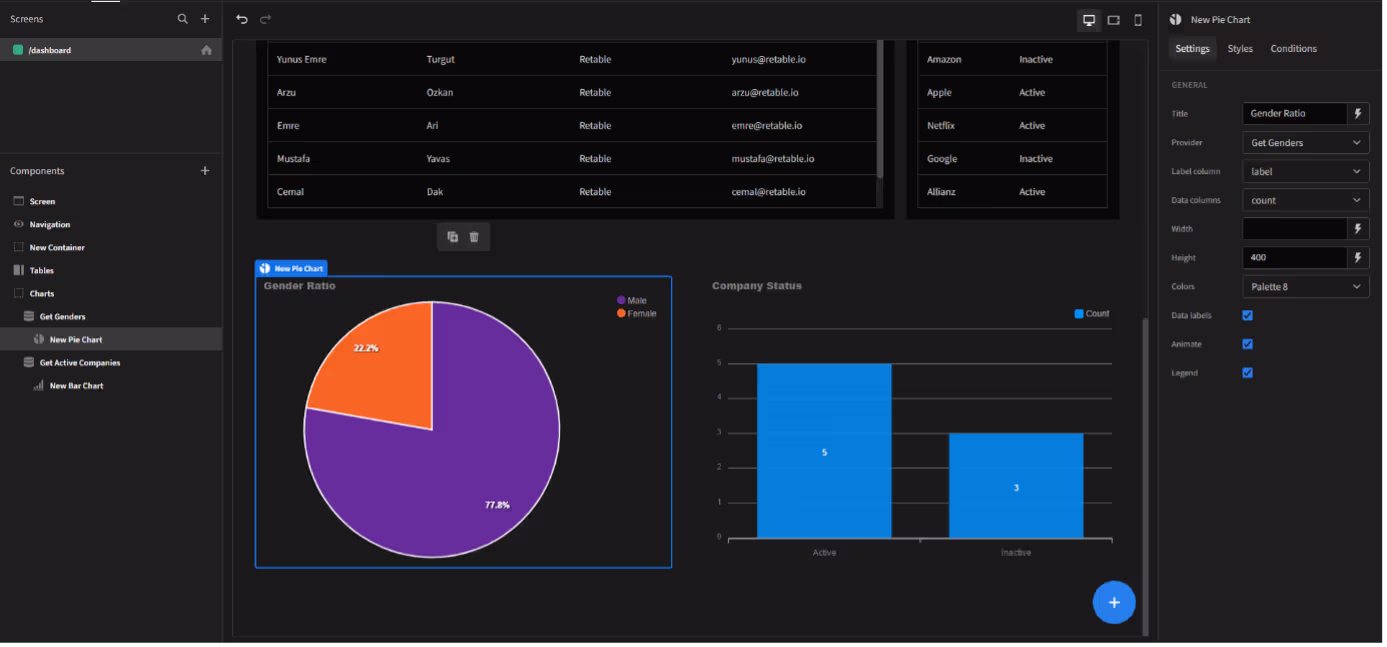
Adding chart components
Another component structure offered by Budibase is Chart. By using these components, we can visually strengthen our application. The way to do this in Budibase is quite simple. First, let's add a Data Provider component and select a REST API method we wrote before as the data source. The thing to pay attention to here is to return the result of the request we made using the REST API as "label" and "count".
Then, let's add another "Pie Chart" component into this component and set the "Provider" property to showthe Data Provider component we just added. Finally, let's set the "Label columns" and "Data columns" properties as "label" and"count" as we just mentioned. And the component is here in all its glory.
We can add other Chart components by repeating these steps.
Adding other screens
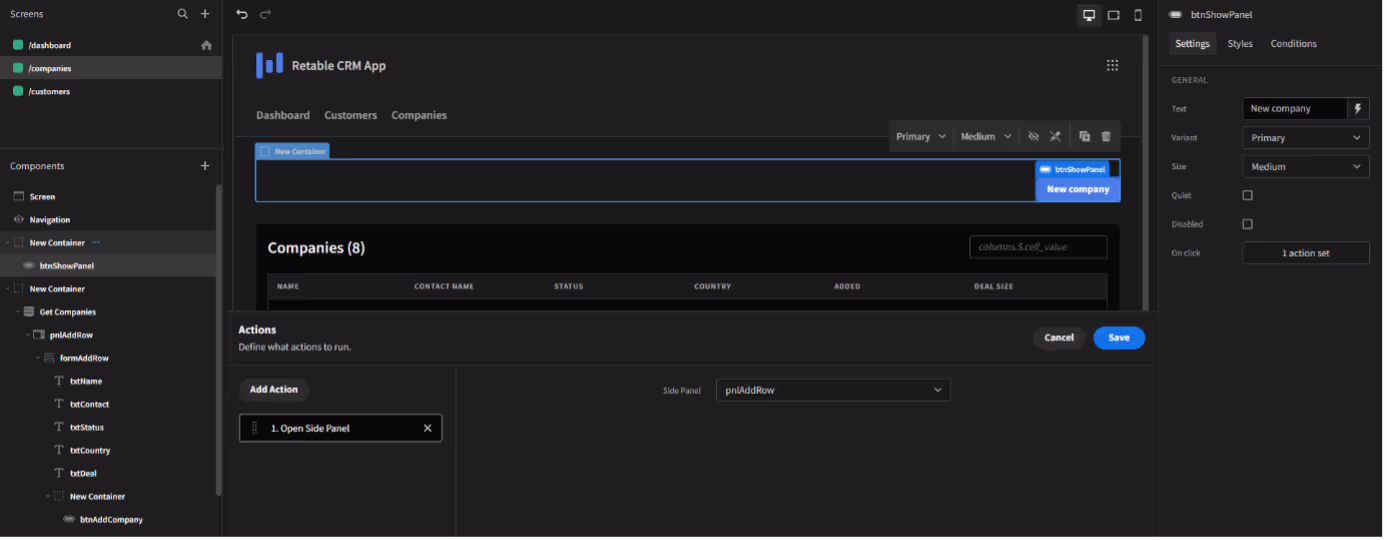
Now let's create another screen called Companies. On this screen, we will list the companies and perform the operations of adding, updating and deleting companies.
Let's start as usual by adding the Data Provider component. Then let's add a "Form" component into this component. Then we will add our table into this Form component. The reason forthis is that we will use this form for update and deletion operations. After setting the Data and Columns properties of our table, the data will appear in the table.
To perform deletion and update operations, let's add the "Side panel" component to our Form component and add "Text Field" components corresponding to the columns in our table. In addition, let's add two buttons that will perform Delete and Update operations.
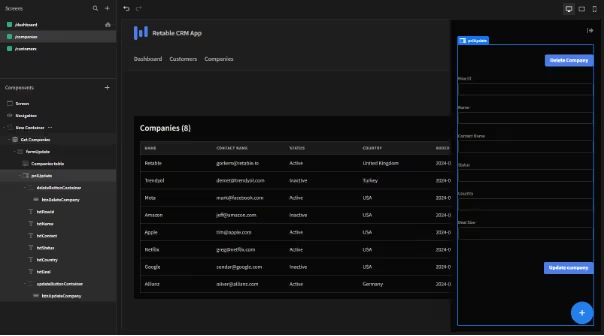
Since we will be updating here, the data must be complete. To achieve this, we need to use the "On Row Click" feature of our table.
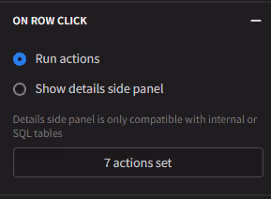
Here we can set as many actions as we want onthe lines. Since there are 6 columns in the table, including Row ID, and wewanted to open the panel where update and delete operations will be performed after clicking on the row, we added 7 actions.

The "Update Field Value" action here asks us for different parameters, such as which form it will be used for and which value will be transferred to the input in the form. After providing these, the last "Open Side Panel" action asks which Panel will beopened. Here we select the component called pnl Update that we added before and continue on our way.
Note: We can change the names of the components at the top of the right window after selecting the components in theleft window.
To perform the update process, we will add some actions to the button we added to the panel.
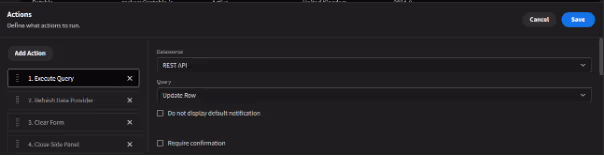
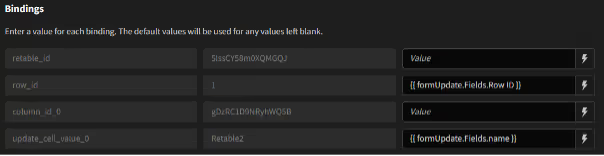
First we choose which REST API request to run.We select the "Update Row" request that we added before. Then, thereis the binding selection process at the bottom. Here we select the values ofthe inputs corresponding to each line in the form.
Then we add the "Refresh Data Provider" action and select the Data Provider component we added first. The reason for this is to instantly update the table when there is update anddelete.
We add "Clear Form" as the 3rd action and select the Form component we are currently in.
Finally, we finish this process by adding the "Close Side Panel" action.
We can apply the same operations to the Delete button, which is the other button in the panel, except for the "Clear Form" action.
Finally, let's perform the addition process. First, let's add a button above our table and this button will open the panel where the addition will take place. Then let's add the panel where the adding process will take place. We add this panel component to the data provider component. Then, we add a form to this panel corresponding to the columns inthe table, the "Text Field" components into this form, and finally the button that will perform the adding action. Then we will add an action to thebutton we added at the beginning. This action will open the panel.
We define four different actions for the button in the panel.

First, we add the action that will run the "Add New Row" query, almost the same as the update process, andperform the necessary binding operations.
Then we select the "Refresh Data Provider" action again and update our table. We select "Clear Form" as the 3rd action and "Close Side Panel" as the lastaction.
We can also create the "Customers" screen by performing similar operations.
By doing these operations, we have developed a CRM application that includes CRUD operations.
You can take the first step to create your CRM application by subscribing to Retable for free. Follow this path and benefit from the flexibility of code-free application development!
more
Related Resources


Create your smart data management solution
Plan, track, and analyse with your ease. Transform your data with an all-in-one platform, collaborate with your teammates.
Try for free!